Monday, September 30, 2013

The Butterfly


Another art journal page today.
If you are interested in learning how to create your own pages make sure to head over to 
Under Mixed Media Savvy there are all sorts of classes to check out.

Today's page is done on a Gelli print background.
The circle stencil I use is one of my favorites from


The butterflies are die cuts from Kaisercraft.
They are all outlined and smudged with charcoal pencil 
then outlined again with a white gel pen.

Stamping was done over the background using 
Archival ink and a Prima stamp.

The butterfly quote is from Artistic Outpost.

Thanks for stopping by and have a wonderful day!

Thursday, September 26, 2013

Modeling Paste Fun

Sharing some samples today from my 
class which is now available over at 

I made a couple of these little wallhangings using a technique 
I share with you in the class.
They are perfect to display around the house or give to
friends and family


Thanks for stopping by and have a great day!

Wednesday, September 25, 2013

Inside you....

Playing in the art journal again today.

I started by swiping several Distress Paints ( Peeled Paint, Rusty Hinge & Frayed Burlap) 
all over a page in my journal.
This was followed up by spritzing with water, blotting then 2 different Color Shine mist
 (Georgia Peach & Chartreuse)
 from Heidi Swapp.

Acrylic paint (Lake Mist by Ranger) through sequin waste and ink 
through a Crafter's Workshop stencil.
Stamping with a Prima stamp as well.

The tree was created by taking a webster's Pages sticker negative from an old sheet.
Placing it on my page and swiping Modeling Paste through it.
Once the MP was dry I painted it first with Golden Fluid Acrylic in Van Dyke Brown Hue, 
then over in spots with Honey Amber Silks Acrylic Glaze.
A final dry brush of Gesso in spots.

The quote was found by browsing Pinterest.
I was really looking for a fall quote, fall is finally settling into the area, with perfect days and cool nights.
Yet as the way it goes I stumbled across this quote by
Captain Jean Luc Picard
(yes I am a Star Trek fan)
and knew immediately it is what needed to be on the page.
The desire to always be better, do better, achieve better...
The best part of being human.

Thanks for stopping by and have a great day!

Tuesday, September 24, 2013

File Folder Mini Album


Once upon a time I saw directions on how to turn
a manila file folder into a mini album 
using your sewing machine.
Now as I am all over anything that encourages me to use my machine 
I had to make several.

This is the second one I made and as it is September
I went with a school theme.
The base is a manila folder and I used quite a few collage elements from 
as well as bits and bobs from my stash.


Layering the front with paper and fabric.
I left all my thread tails dangling.
The Number 1 comes from 
Club Scrap.

Inside the first 2 pages.
Used more stitching to make pockets where I added school theme tags.

Next 2 pages.
More tags, ruler bit, book text and more.

Closeup of some of the library cards etc that were used.

The flash card was covered with Gesso and inked 
leaving plenty of room to journal if wishing.

The back page.
Dictionary pages mixed with fabric 
and machine stitching.

Thanks for stopping by and have a great day!

Monday, September 23, 2013

It goes on....

Sharing an art journal page today.
The background is done on a Gelli print created on a piece of Deli paper.
Once the base was created I then stenciled over with pigment ink, 
and stamped with a script stamp and StazOn.

The large stamps were done with archival ink and outlined with white gel pen.

The title is from a Robert Frost quote....

In three words 
I can sum up everything
I've learned about life:
IT GOES ON

closeup of the large stamp


and so it goes....

Thanks for stopping by and have a great day.

Friday, September 20, 2013

Watercoloring with Pigment Inks


    A little while ago I received several of the Pigment ink cubes from Tsukinenko and was given the task of creating several pieces of art with them for the magazine Scrapbook News and Review.
I wanted to go above and beyond just stamping with them and came up with this.

Using the inks as watercolor paints on a canvas sheet.

  First I cut a piece of canvas down to 12x12 inches and taking Solvent ink and my large stamp;
  I stamped three large flowers in the upper left corner and bottom right. I used the solvent ink because I would be adding water and needed a base that wasn't going to run.
  I began adding color using a Fantastix coloring tool. Dipping it into water and touching it to my ink pad. By regulating how much water I added I could vary the color and shade.
  Continuing on to color all my flowers...
  Then adding highlights with a brighter color, and filling in my center with yellow. All using the fantastix tool and water to turn my Pigment inks into a sort of faux watercolor. I dragged some color past the edges of my stamped image to create more of the painted look.
  The leaves were colored in the same way.
   I added some textured Goosebumps mist to my centers for some sparkle.
  This is the finished layout. I used more watered down ink to create a frame around my photo. The stencil is from Crafter's Workshop and I just used a Sharpie to trace it.
Machine stitching around the border to make sure my edges don't fray and to attach a touch of lace.
  I love how this came out. It looks like I spent hours painting when in fact it came together really quick. By adding just a touch of water to the inks you can create some really cool watercolored looks.

This layout and tutorial was featured in  Scrapbook News and Review.

Thanks for stopping by and have a great day.

Wednesday, September 18, 2013

Dream....


This is an 8x8 canvas I started working on several days ago 
trying to get out of a mojo funk.

I started by just randomly placing papers and embellishments from on my desk
across
the canvas not really knowing what I wanted to do.

I used lace, doilies, chipboard,  and drywall tape for texture along with Modeling Paste through a stencil and on it's own.
2 brackets are from my extremely large Grungebord stash.
Covered everything with a layer of Gesso and began adding color.

Tattered Angels Glimmer mists, Silks Acrylic Glaze and Ranger Distress Paints
all provide the color here.

Stamping with Staz On.

Once I had layers and colors I needed to figure what to do with it.
I found this collage image in my stash and fussy cut her to fit in the frame (by Kaisercraft).
She is outlined with a charcoal pencil.
The title is also a Kaisercraft stamp.

Just a closeup of some of the texture I created.


Tuesday, September 17, 2013

August sketch challenge at SEM!


          It's the middle of the month which means it's time for another sketch challenge at
                                                    Scrapping Everyday Miracles.
 There are 2 sketches to choose from, a scrapbook one using multiple photos or a card sketch.
as always with the sketches there is a twist to follow.
Twist: include some sort of string/fiber in your project


card sketch:

This time around I took the card sketch and turned it into an art journal page.

Sketches are truly versatile and can be used for inspiration,
no matter what you are creating.

The background is created using the technique I shared back in May on the Scrapping Everyday Miracles blog.

I used a Dylusions stencil and acrylic paint for my circles, which were then outlined and smudged with a charcoal pencil.

My take on the twist was some pink rope which I used to create a bow and swirls on my page.
I also added some random script and sail stamping using StazOn.


Thanks for stopping by and make sure to head over to Scrapping Everyday Miracles and link up YOUR take on the sketches.

Have a great day!

Monday, September 16, 2013

New Adventure....

Over at Swirlydoos 
I'm participating in the 

This time I am a member of Team 4 and got to lift Erica's beautiful layout.

The twist this month (you know there has to be one)

Will the giddiness ever end? Maybe not, because, of course, we need to have a theme, don’t we? And after much thought, I have picked the perfect theme for September: Beginnings!!!! Here in the Northeast, the school year starts during the first week of this month and it puts me in mind of new clothes, new supplies, new teachers and new classrooms. With that in mind, I’d love to see your take on “new” and “beginning”, using just what these words mean to you.

and this is what I created...
My take on NEW is with this photo of the middle daughter. She is an avid soccer player, playing not only for her club but also the State in the Olympic Development Program.
This past summer the State chose her as one of the top in her age group and sent her to Alabama to Regional Pool training, where she would train with the best soccer players in our 13 state Region (Region III). She was gone for 5 days playing soccer from wake up until bed time.
                                My husband caught this photo as she checked in, 
                                           beginning her New Adventure.
                            

           I used the June kit Brass Shilling from Swirlydoos for the majority of supplies, just about everything else used can be found in the store. 
                            My papers are from Kaisercraft.
                   

  I altered the papers with Modeling Paste, a stencil from Crafter's Workshop, Moonshadow mist from Lindy's Stamp Gang, Silks Acrylic Glaze, and stamping.
I layered corrugated cardboard, and burlap under my photo.
I had these 2 silver hinges forever. To make them fit my color scheme I dripped some Alcohol Ink onto them.


I clustered several types of Prima & Petaloo flowers.
The flourishes all come from Dusty Attic and were colored with Dark Bark Prima ink.
The words are all rub ons.

There is also a bit of Creative Imaginations Doily paper peeking out in the layers.

Thanks for stopping by and make sure you head on over to Swirlydoos to see the other lifts this week..


Friday, September 13, 2013

ATCs, a Tag and a Card


Today I'm sharing several pieces which were recently seen in
Scrapbook News and Review.

While I tend to work on bigger things like scrapbook pages, art journal
pages and canvases, it's always fun to occasionally go down in size.

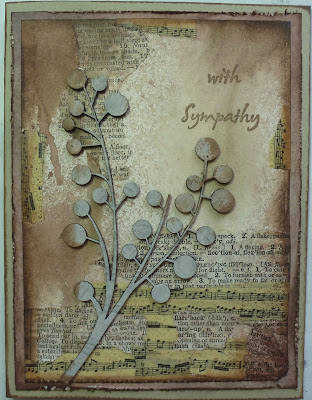
The first piece is a simple sympathy card.
The base is watercolor paper, layered with Washii tape and book text.
Colored with Lindy's Stamp Gang mist.
The chipboard is from Dusty Attic.


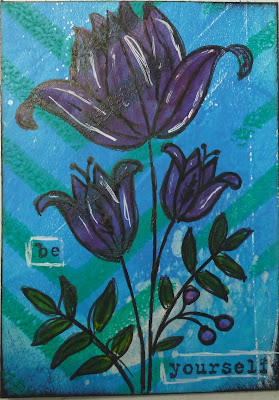
Next I have an ATC created on a Gelli print base.
I save all bits of leftover prints, and ATCs are a perfect way to use them up.
The stamp is from Hero Arts, stamped with StazOn ink and colored with Faber Castell Big Brush pens.
A white gel pen was used to add accents.


The next ATC is done on a base of pape rtowel leftover from cleaning my desk.
(yes I save EVERYTHING)
Stamped onto it with a script stamp.
Added the sentiment and a chipboard sticker from Pink Paislee. 


Here is a tag done on another Gelli print done over an old map.
I outlined the buildings and added more torn Gelli prints for the ground as a contrast.


Last but not least is my RED ATC
done for the color theme.
I just collected red items found on my desk and collaged them onto my base.


Thanks for stopping by and have a great day!

Thursday, September 12, 2013

Modeling Paste Fun


                        Modeling Paste

               is one of the hottest items to use in paper crafting right now. 

What started out as a medium for fine artist to build layers on canvasses and paintings has jumped into the scrapbooking world with a splash. This versatile medium can be used for layouts and art journal pages and everything in-between.
If you've seen it while browsing galleries and wondered how you could use it on your projects, then wonder no more.
In this one week class called
Modeling Paste Fun
for only $19.99 is now available at The Art Studio
                   http://theartstudio.scrapbooknewsandreview.com/classes/unique-techniques-2/modeling-paste-fun

I'll show you how to incorporate modeling paste into a multitude of projects. We'll use supplies we already have on hand such as stencils, mists, stamps and more to create layouts, tags, art journal pages, etc.


                   http://theartstudio.scrapbooknewsandreview.com/classes/unique-techniques-2/modeling-paste-fun


Still unsure?
I'll also show you how to create a layout like this:

                  http://theartstudio.scrapbooknewsandreview.com/classes/unique-techniques-2/modeling-paste-fun

And you'll do a tag or art journal page that looks something like this:

                             http://theartstudio.scrapbooknewsandreview.com/classes/unique-techniques-2/modeling-paste-fun


The projects you can create with modeling paste are truly endless. 
    Modeling Paste Fun  starts now so get your supplies ready to go.