It's time for challenge 10 at
This week the Craft Hoarders Anonymous Challenge
Blog is changing it up...with a blog hop! Challenge #10 is ready at the Craft Hoarders Anonymous
Challenge Blog but we are doing things a bit differently this time! We
are doing a week-long blog hop with STENCIL GIRL!
Each day this week you will visit the Craft Hoarders Anonymous
Challenge Blog see the
fabulous designs of the Craft Hoarders Anonymous Team, and then you will visit
the StencilGirl Talk Blog to see what their team is doing! For
the blog hop order, see the end of the post.

Now, for the challenge!
Challenge #10 Spray It! Ink It! Paint It! Smear It! Emboss It!
Show us your inner mixed media diva! Use spray mists, inks, paints, modeling paste, embossing powder, pastels, chalk, and whatever messy media you can find! Let's dig into that hoard, pull out some of that "messy stuff," and use it up! There is a mess-maker hiding in all of you! Let her/him out to play!
I created this 9x12 canvas for the challenge.
If you keep scrolling I even have a step by step on how the background was created.

Stencil Girl Stencils used for this piece:
Some closeups...


Supplies:
Stencil Girl stencils
Tim Holtz stamps
Unity Stamp
Washii tape
Archival ink
Gelatos
Silks Acrylic paint
Golden fluid acrylics & Liquitex acrylic paint
Book text
Dylusions mist
Lindys Stamp Gang Starburst Spray
Gesso
Remember I said there was a step by step on how I created the background?
Well here you go….

Cover a canvas with torn pieces of book text and Washii tape.
Don't cover the whole canvas, the paint will react differently with the different surfaces adding some interesting texture later on.

Give a very light wash of Gesso over the canvas.
Wipe off most of it, you aren't covering the text, just toning it down.

Using the 9x12 Map stencil add Grey paint to the canvas.

Use the 6x6 Broken Circles stencil and teal paint.
Add the circles randomly across the canvas.

Mist with Lindy's Stamp Gang Starburst Spray
Lift the canvas so the mist drips down, then dry.

Stamp in spots with the checkerboard stamp from Tim Holtz and Archival ink.

Use the 6x6 Circle Rays stencil and Orange Gelato.
Add several spots of the rays and orange.

Using Teal Zircon Silks Acrylic Glaze and my finger
I added spots of color in areas.
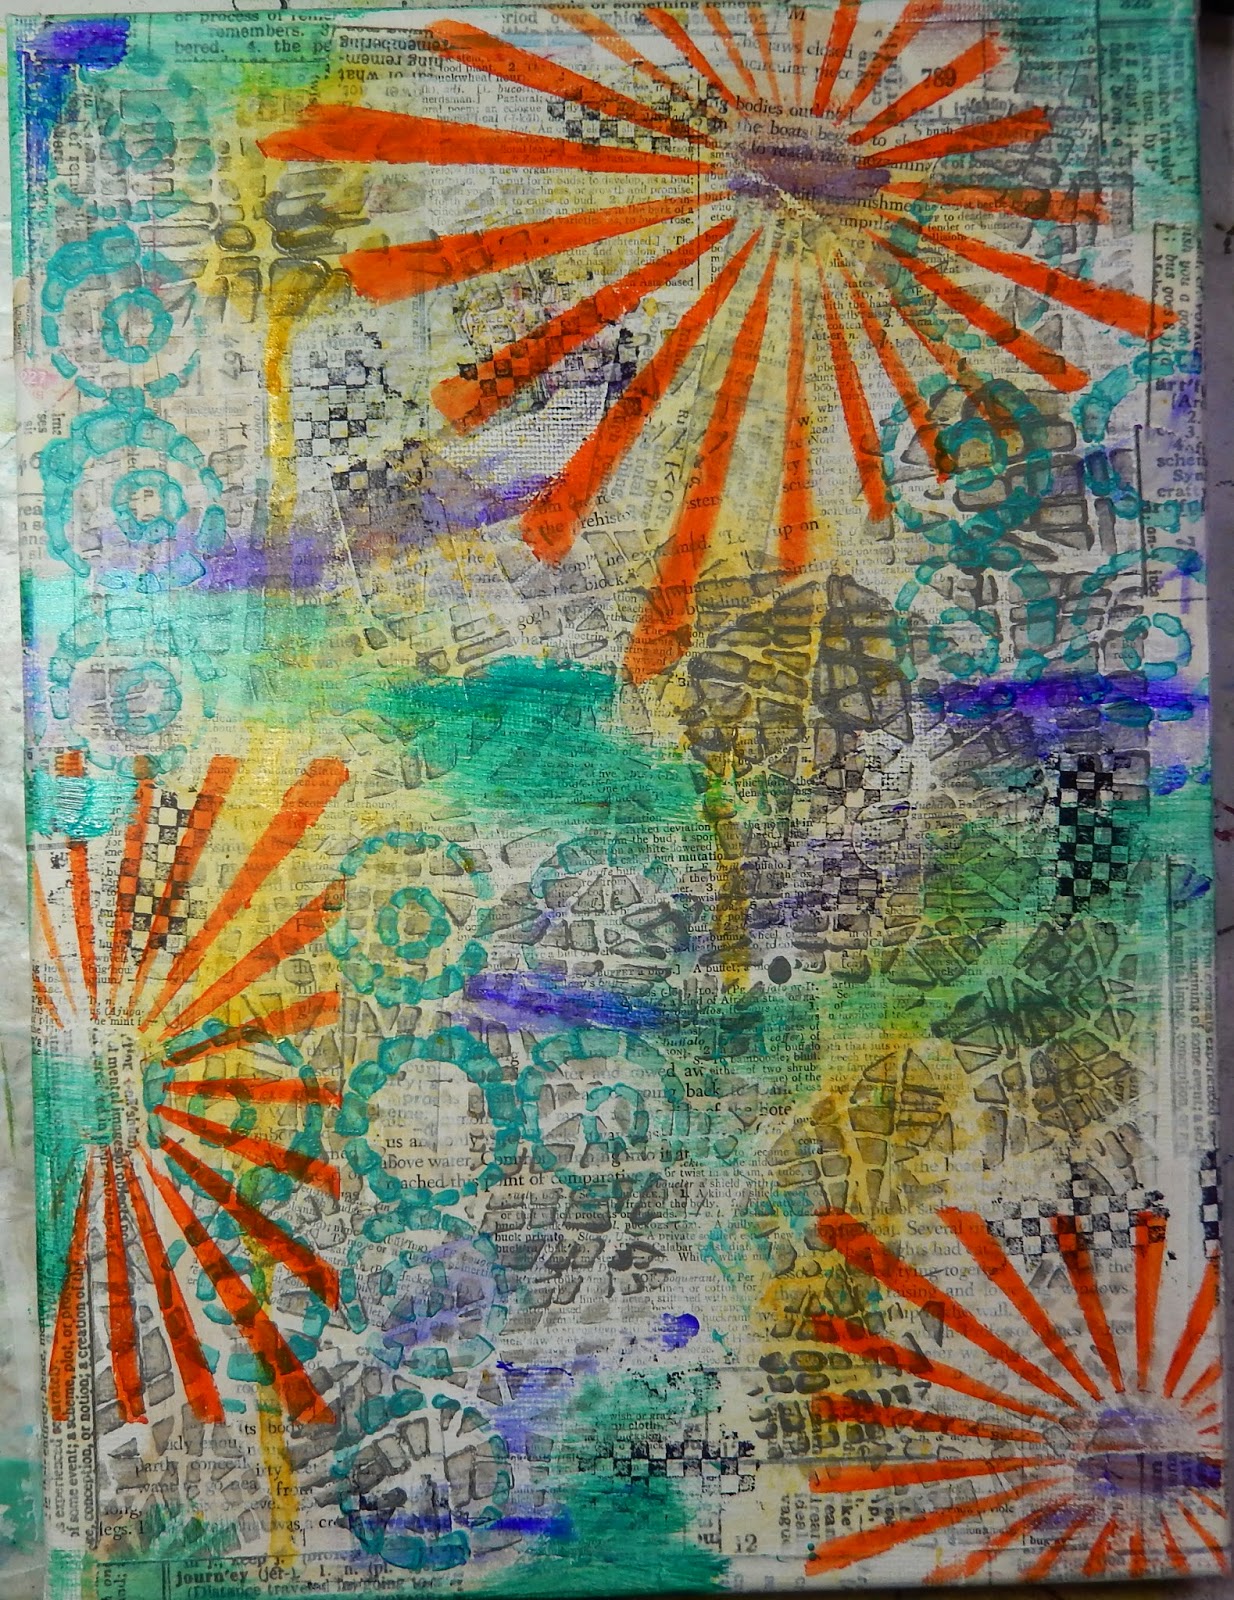
I repeated this again using Snapdragon Silks Acrylic Glaze and my finger.
Both times just to add a bit more color, and using my finger really lets me rub and blend the color in.

I stamped the stars (again Tim Holtz) using Archival Ink.

And added a large heart cut from book text.
Finished it off with a stamped sentiment and a burst of Vibrant Turquoise mist from Dylusions.

Blog Hop Order:
June 16
Christy Butters (that's me!)
June 17
June 18
June 19
June 20
Remember, you have two weeks to play in the new
challenge! Challenge #10 closes June 29th at midnight PT. Link up your project here to
Challenge #10.
One talented participant will receive this prize,
donated by Stencil Girl and WorldWin Papers.

The winner will receive a selection of WorldWin papers in 12 x 12 and 8 1/2 x 11, three Stencil Girl stencils, and a DVD.
Thanks for stopping by and have a great day!
69 comments:
Lovely canvas enjoyed reading all the techniques you used creating this masterpiece
Christy, just like your project says, beautiful! I love it, thanks for the step by step process.
I love all the layers, colors and textures you used to create this work of art! This is definitely your medium!
Thanks for the steps for making this beautiful piece. Love the sun rays shining down on the hearts.
Thanks for sharing your ideas.
The circle rays stencil is one of my faves, and orange is such a great "pop" color. Love the piece.
Love this!
Christy, thank you sooo much for the step by step! In your close ups of the finished canvas I can see the layers, but seeing each one as its applied gets the creative wheels spinning!
Great process shots! thanks
Love your project! Thanks for the step by step tutorial.
Wow, beautiful project.
I simply love your canvas!
Beautiful masterpiece with step by step techniques tutorial!!! Thanks for sharing!
What a super tutorial. Your mixed media work is always spot on! I love looking for all the "hidden gems" in each piece you make! This is another amazing project!
I'm new to stenciling and found your tutorial to be a great help.
Thanks!
Wow, I love your canvas. They're just my colours, it's so inspiring. Thank you a much for the step by step guide, I'll be trying that soon xx
The background on that canvas is awesome...I'm off to make a few.
What a great page really love it!
thanks for the tutorial I did love the end result
Great tutorial!
I really like how you used Mary Nasser's map stencil!
great page!
Christy...your canvas is awesome! I so love your vibrant background with all of the different patterns! That teal heart really captured my attention. I love how you've added some black scribble lines around it to really give it depth. This is a very very VERY cool canvas! Thanks for sharing the steps. <3 Candy
Christy, great piece of art. I learned a lot from this post and cannot wait to try some of this on my own. Love this piece!
that is just beautiful, I love the amount of products used. just jaw dropping.
Fabulous step by step - so cool seeing all those layers building up, and the finished canvas is a showstopper! Love the bold colours, the amazing dimensional depth you created on the heart with your shading... it all just works brilliantly. Great inspiration for the challenge, thank you.
Alison x
Great page! Thank you for the inspiration!
Love your project! The orange really pops off the page! Love it!
This is gorgeous Christy! I love all the different stencils you used. The sunburst in orange are amazing!
love the stencil work, and hearts are always wonderful!!!!
Wow neat project. Love all the steps showing how it is done. THanks for sharing it.
Gorgeous!!! Love, love, love and so glad you did a step out...going to practice more so I can be a bit better in my creating. Thanks
This is Gorgeous!! All the layers you created give it so much depth and interest... thanks for the inspiration and the extra pics showing the steps!
One of my daughters walked into the room when I was looking at the photo of the large HEART and said she wanted to know how to do that exactly in her journal she is making. So happy to find out you shared the how to in steps with photos !!!
Just an amazing and colorful project for this challenge Christy..love it!! xo
Love the process and the colors!!! The more layers the better, great project! ! ♡
Absolutely love your canvas. Would like to win the blog hop, but you won't let me comment with name/url and I don't have any of the other accounts. Except Google, and it insists I'm unknown, even though it clearly shows my email address below. You'll get more comments if you allow other options.
Oh, wow....LOVE the orange rays! They are so bright and vibrant against the background!! Great project!!
<3 J
jwoolbright at gmail dot com
HerPeacefulGarden.blogspot.com
I am a huge fan of orange with turquoise...it just is such a happy combination. And this whole piece makes me happy! The tutorial is wonderful, and all those luscious layers of inky goodness behind that amazing true blue heart.....wow!
This is soooo gorgeous!
Love the blue heart!
Thank you for incorporating my map stencil, too! :)
I thought you would hit this challenge out of the ballpark...and you did! Love it! And thanks for showing the steps. I am new to the stencil/spray/mixed media world. Your steps are very helpful!
great canvas...like all the stencils and bright colors.
stamping sue
http://stampingsueinconnecticut.blogspot.com/
Love the beautiful Mixed Media piece. Love the stencils too. Wow!!!
It's always so interesting to see how backgrounds develop. Thanks for taking the time to show us this one -- gorgeous.
i think this is stunning. Backgrounds are so much fun
Love this !!
Thank you for showing us how you made it !!
wow your work is absolutely stunning, thanks for this amazing tutorial!
I love the layers and the colors in this piece. Thanks for showing the step-by-step. Fascinating to see your process.
This is gorgeous and thank you for the tutorial and pics! Love the splash of color from the circle rays stencil all around the heart! So fun!
Love the stars, suns, and heart. Thanks for sharing how you made it.
Absolutely LOVE this work! The colors, the textures, the design, OMG it is wonderful!
Love your canvas and the stencils you chose! Great popping colors too!
Great canvas and I love how you have build the background.
GASP! This is GORGEOUS!!! LOOOOOVED the TUTORIAL! (I love Gelatos too!) AND your heart just POPS of the page!!! WONDERFUL SHADING! Well, WONDERFUL EVERYTHING!!! LOL :D
This is just a wonderful piece of art! I love all the stencils you used with all various colors just gorgeous. Thanks for showing us how you achieved this beautiful look. :D
Love working with old book text! Thanks for the tutorial. Lovely piece!
Wonderful piece! Thanks for showing all the steps.
You nailed 'beautiful'! I love it!
Your canvas and tutorial are just "beautiful"! Thanks so much for playing with us at StencilGirl this week!
LOL..I have hoarded some of the same items. I just didn't know what to do with my washi tapes, gelatos or Dylusions so you've given me some great inspiration. Love the finished piece!
Christy, this is just AMAZING!! Love, love, love the overall effect and that stunning heart at the center. Thanks for the cool tutorial! So incredible!!
Totally love this! Love the colors and the stencils that were used! Love the shading around the heart. Great job! Thanks for sharing.
Katie B.
I loved seeing the steps used to create this canvas
Love all the layers and design elements! Thanks for sharing!
I can't even begin to tell you how much I love your page!! That heart….truly 'beautiful'…..Words can't express my connection to this piece! Thank you!!
Hi Christy! Your page is poppin'! Wonderful color palette and awesome layering of stencil patterns and texture. Beautiful :)
Oh I live this painting it's beautiful! Thanks for showing us the tutorial I would live to try it out!
Christy, this is really special - the layers are awesome. thanks for using our stencils :)
Wonderfully made! Amazing!
Oh my goodness. I love this. I would love this on my wall! The step by step was great.
Jess
Post a Comment