Friday, April 11, 2014

Documented Life week 15…MONOCHROME

Time for another week of
WEEK 15 (gasp)

the challenge this week..
April 5, 2014 - Week 15 Challenge - Monochromatic: use shades, tints and hues of one color!

If you can't guess I went with blues.
They are always my go to color.
My wardrobe consists of mostly blues and when I and creating
Blue is what I pick first.

Here is my page…
And if you scroll down you get a bonus step by step on how I created my 
background :)
Happy Friday lol

Here are some closeups of the page.
I pulled out a Tim Holtz die and cut flowers with my leftover
bits of the background paper.

The quote comes from one of my favorite movies
A League of Their Own
while it's a baseball movie the quote so
fits the way I live my life.
I want challenges!


Now as promised my step by step.
I worked on a 12x 12 piece of paper to start.
Again the leftovers go into Happy Mail envelopes
(this time though after my flowers very little was left :( )

Started by first scraping Golden Fluid Acrylic across the page 
then misting with Dylusions.
I took a wet paintbrush and moved the color around even more
making drips and blobs
and all the things that make me happy.

Golden Acrylic paint and my finger

More Golden paint 

2 Colors of Liquitex Acrylic ink.
Use the dropper and add drops holding the dropper from about
6" over the paper.
Blow the inks out from the center.
Blow hard :)


Stamping with Solvent ink.

More stamping with another color of Solvent ink.

Faber Castell Pitt Artist Pen and an UmWow
stencil.
I just added random circles across the page.

Then I took my White Pitt Artist Pen
and highlighted the center of each circle.
Now my paper is ready to go and be turned into the page you first saw.

Make sure to stop by the Facebook and Flickr pages to see how
others have interpreted this challenge.

Thanks for stopping by and have a great day!

Thursday, April 10, 2014

Swirlydoos April Challenge ME!


Every month there is a challenge on the 
Swirlydoos forum 
that is member hosted.

This month Kimberly hosts
and her challenge was
to use a photo of yourself along with mixed media.

I'm all over the mixed media part,
the photo of me….. eehhhhhh
those are hard to come by.

However looking through my photos,
 I found this one of me when we were in Italy.
I'm usually the photographer and this time
someone caught me in the act.
I used Authentique paper which came in the April kit.

First I used a letter stencil and
Black Marble Dylusions mist to create a background over the patterned paper.

Followed with stamping using Prima stamp and Archival ink.
Lindy's Stamp Gang mist through a Crafter's Workshop stencil.
The frame was colored with gelatos as was the background on my photo
where I had sanded out the car tires that were
in with me 
(I'm scrunched down to get the photo)

The flowers are Petaloo, flourish is Prima,
and both also came in the kit.

More stamping with another stamp.
A doily was cut in half and placed on the side and bottom
of my layout.
Liquitex Acrylic ink and my pen nib to write my title and throw in a few
more circles around my misted ones.

This turned out to be a fun layout to create.
Thanks for stopping by and have a great day!

Wednesday, April 9, 2014

Background Tutorial: Stamp with Gesso

Hey everyone;
I thought I'd share another mixed media tutorial
with y'all today.

Today we are stamping with Gesso and then adding various coloring mediums
to create backgrounds for cards, tags, ATCS, Journal pages and more.

Now I am using tags in my samples but you can use any size piece of card stock.

Supplies:
Manila Tags
Gesso
Background stamps
Piece of foam (I use a cosmetic sponge)
Coloring Mediums (ie Distress Inks, Stains, Mists etc)
Spray bottle with water
Heatgun (can air dry just takes longer)


Take some Gesso onto your foam piece


Cover the stamp with the gesso by dabbing it on.
You could use a paintbrush or dip the stamp in the paint but in my opinion using the foam gives better / even coverage and uses less paint.


Stamp onto the tag. 
Add more Gesso and stamp as needed until the tag is covered with images.
Air dry or use your heat gun.


Take some Distress inks and rub onto a non stick sheet.
Mist with water.


Drag your tag through repeatedly until you are happy with the color coverage.
Dry.


Here is one tag, after the first 2 colors I went back and added some Fired Brick as well.


Another sample with different inks.
I pulled out some REALLY REALLY old ink pads from
Nick Bantock.
These ink pads are so dry that I rubbed directly onto the paper, barely got any color, and blended with a baby wipe.
The wipe reactivated the ink enough that I was able to get
so fantastic color coverage.


This one is done by misting with Dylusions and spreading the color with a wet paintbrush.


This one is done using Distress Stains.

The three Distress Inks for this tag.

Here are a bunch of these tags ready to be used.

These are ready to be embellished and further stamped on (use Solvent or Archival ink) to become finished pieces.

I can't wait to see what you do with this.
If you try PLEASE send me a link so I can see what you create :)

Thanks for stopping by and have a great day!

Monday, April 7, 2014

Craft Hoarders Anonymous Challenge 5--Put a stamp on it.

It's time for another challenge at
Craft Hoarders Anonymous!


                        Challenge #5 Pick a Stamp, Any Stamp!
You don't have to be a card maker to hoard stamps! With the popularity of pocket-style scrapbooking and the explosion of journaling stamps on the market, many scrapbookers have also become stamp hoarders. Plus, digital stamps are more popular than ever. I am sure that most of us have at least one stamp in our stash! You may "collect" wood mounted stamps, clear stamps, cling rubber, or even digital! Get one out, dust it off, and make it the STAR of your project! We want to see a stamp (sentiment, word art, image, etc.) as the focal point of your project! Feel free to use more than one stamp, but you must have AT LEAST ONE stamped item on your project.


This challenge is sponsored by
Hampton Art, 
founded in 1980 in picturesque Long Island, NY, it has been inspiring stampers, crafters and papercraft enthusiasts for over 20 years. One of the earliest “art stamp” companies, Hampton has transformed over the years to become a complete provider of creative products such as stamps, inks, papers, kids crafts, stationery, scrapbooking supplies, and card making accessories for crafters of every age and skill level. We focus on working together with other companies through strong, personal relationships and licensing partnerships to consistently bring fun, inspiring products to market. We have a portfolio of brands including Hampton Art™, Studio G™, Diffusion, Ditto™, and our latest addition, Ki Memories®, acquired in 2012. Our products can be found via most national craft retailers at over 5000 stores across the US and Canada. We also ship to 20 different countries across the globe. Hampton was acquired by National Spinning Co, Inc. of Washington, NC, our current home, in 2008. For more information, visit our Website.

Here is the stamp set I used.
It's one of my favorites by Hampton Art for
7Gypsies.

Here is the piece I created.
It's a page in my art journal.
Spring finally seems to be making an appearance after
a long miserable winter 
and I wanted to celebrate it.

The background is several colors of
Liquitex Acrylic Paints
scraped along the page with an old credit card.
Once dried I used The script stamp from the set and Archival Ink
to stamp randomly across the page.

The giant circles were cut from Hampton Art Paper
(Growing Garden by KI)
and applies across the page.
A thin layer of Gesso was rubbed across each one to tone it
down and blend into the background.
Yet still letting the pattern show through.
Liquitex Acrylic Ink and my pen nib were used to outline each circle several times.

The bird was drawn and the painted in with Gesso.
Portfolio Water Soluble Oil Pastels
were used to color in the bird and limb.
The entire image was outlined with a black Portfolio crayon.
Because these blend so easily I used my finger and the
occasional baby wipe to go around and blend the color until I was happy.
The music note is also from the stamp set.
I colored it with a Faber Castell Pitt Artist Big Brush marker and stamped across the page.

Supplies:
Hampton Art Patterned Paper, Stamps, and Rhinestone
Liquitex Acrylic Paint
Liquitex Acrylic Ink
The Crafter's Workshop Stencils
Faber Castell Pitt Artist Big Brush markers
Portfolio Water Soluble Oil Pastels
Gesso


Make sure to stop by each Design Team member's blog
and see how they used their stamps this week.
                                         Donna Idlet - http://myblogidlet.blogspot.com/
                                         Glenda Brooks - http://glendabrooks.blogspot.com
                                         Gloria Stengel - http://gloriascraps.blogspot.com/
                                         Karen Zueger - http://lostcoastscrapper.blogspot.com
                                         Pam Bray - http://www.pammejoscrapbookflair.com/
                                         Tammi Bennett - http://www.tjsmemoriesblog.blogspot.com/
                                         Amber Milone - http://pinkchicpaperdesign.blogspot.com/
              you are here-----Christy Butters - http://creatingwiththegirls.blogspot.com/
                                         Debbie Seyer - http://www.debbieseyer.com/
                                         Ginny Nemchak - http://pollyspaper.wordpress.com/
                                         Jan Marie Ennenga - http://re-creations4him.blogspot.com/
                                         Kathy Clement - http://www.kathybydesign.com/kathy-by-design-news/

            Link up your project HERE for a chance to win this most awesome prize!
(note:it DOES NOT include the inside supplies these are merely there to show you what it can carry)

Thanks for stopping by and have an awesome day!


Friday, April 4, 2014

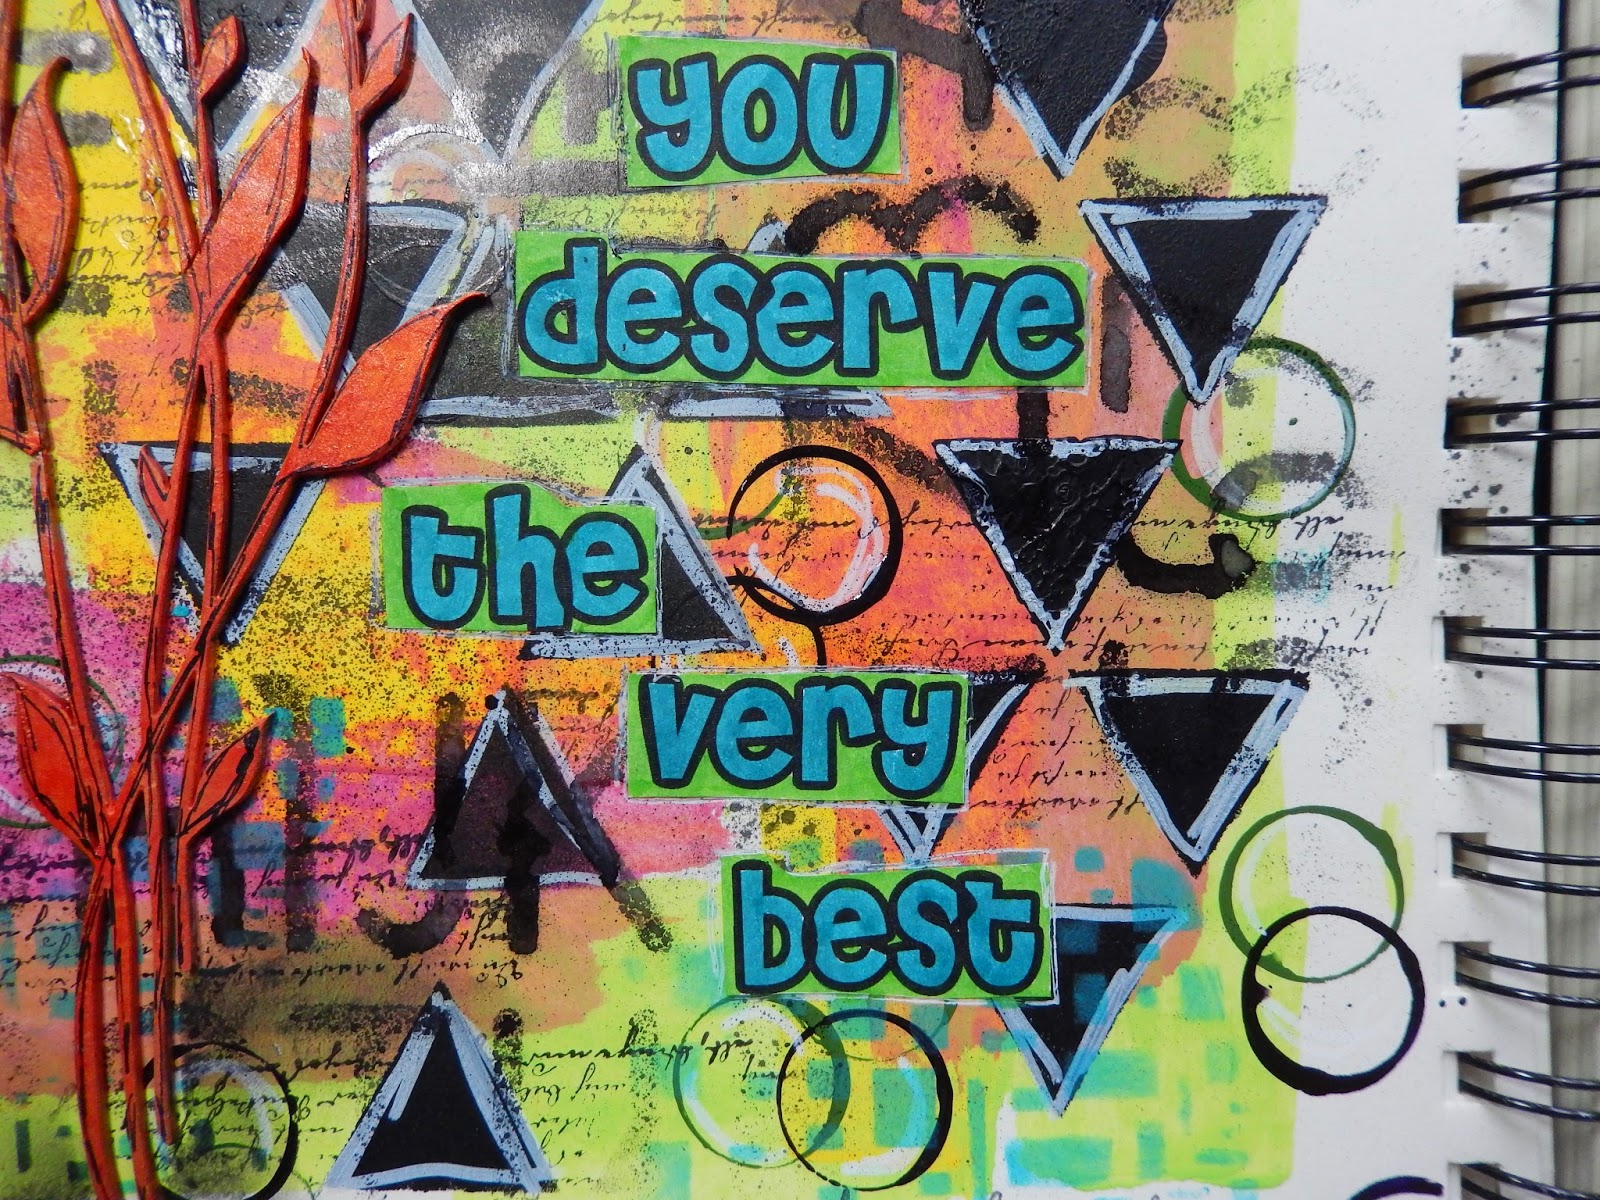
Respect Yourself…an Art Journal page


Art Journal page for today-
RESPECT!

I'm a huge collector of quotes and my favorite way to
save them is on Pinterest.
I can find a quote for just about anything there.

The background for this page began as a lot of my backgrounds do.
When I work on other projects I open to a page in my journal and use it 
to clean up my stencils, paints stamps etc.
When I'm ready to work I already have a jumping off point
(plus it saves money---paint is expensive!)

The background is first some Liquitex Acrylic Paint spread
around with an old credit card.
The Triangles are created using Black Gesso with a
Crafter's Workshop Stencil.
Once they were dry I used my new 
Faber Castell Pitt Artist Pen in White
(seriously my new love) 
and outlined them all.

Stamping with a mist bottle top and acrylic paint.
More of the FC Pitt Artist Pen in the center of the circles.

Gelatos in blue/green were scribbled onto my craft sheet 
and turned into a paint.
Then used with another Crafter's Workshop Stencil and my finger.

Stamping with a Hampton Arts stamp and Archival Ink.

and misting with Dylusions Black Marble through an Alphabet stencil.

The Chipboard is from Dusty Attic.
Painted with Silks Acrylic Glaze and then roughly outlined
using another Pitt Pen.

The quote was printed out on copy paper,
cut out and adhered to the page then colored with
more Pitt Artist Pens.

That's it for today,
Thanks for stopping by and have a great day!

Thursday, April 3, 2014

The Documented Life Project WEEK 14!

I've been working slowly this week 
on the next challenge for 

This challenge:
March 29, 2014 Challenge - Week 14 - Write your name and embellish it.

Now my full name is Christina
But unless you are my Mother and I am in trouble
I'm going with what I have been called forever.
Christy…


I started by first making my background.
Book text applied in spots with Gel Medium. 
Once it was almost dry most was peel off leaving just bits.
Golden Fluid acrylic paint brushed over.
Once dry stamped with Club Scrap stamps and Archival ink.

Onto my letters...

I wanted to completely contrast my background and wound up going
with some of my favorites in blues, greens & purple.
I worked on a 12x 12 sheet so I'd have plenty of painted scraps left over for
Happy Mail.
Golden Fluid acrylics were brushed on with a VERY wet brush.
Misting with Dylusions Crushed Grape through a Crafter's Workshop stencil
(and then just because a great big mist of Dylusions)
Stamping with  Hampton Arts & Prima Stamps.
Lake Mist Paint Dabber through an UmWow stencil
and finally some circle stamping with more Golden Fluids and a mist bottle top.

The letters were cut out free hand and glued to the background.
Each letter was outlined first with a white Gel Pen
and then a fine black Sharpie.

"Stitches" were drawn using a thicker Sharpie 
on the letters and around the border.

Finally using my new purchase of a 
Faber Castell Pitt Artist Pen in White
(totally in love!)
Added random circles around my page.


Make sure you stop by the Facebook and flickr pages to see what others are creating.

Thanks for stopping by and have a great day!


Tuesday, April 1, 2014

April challenges at Scrapping Everyday Miracles!

Welcome to APRIL!
It's time for new challenges at
Scrapping Everyday Miracles

As always we have 3 ways to create and enter:

Challenge #1:  The Theme Challenge
We hope our monthly theme, layout, and card challenges will help you meet your goals while encouraging you to see the daily miracles all around you!

Choose 1 or more:  Faith, Hope, Love
These foundations of the walk as a Christian come from God's Holy Word in 1 Corinthians 13:13.
Bible Verse Inspiration: We hope you will use these Scriptures to inspire your projects!
  • Hebrews 11:1  "Now faith is the assurance of things hoped for, the conviction of things not seen."
  • Romans 15:13  "May the God of hope fill you with all joy and peace in believing, so that by the power of the Holy Spirit you may abound in hope."
  • 1 Corinthians 16:14  "Let all that you do be done in love."
You may enter any type of papercrafted project that fits the theme of "Faith, Hope, Love," or any combination of these!  You may enter a layout, card, tag, wall hanging, canvas, gift packaging, etc.. - as long as it uses paper as one of it's materials! 


Challenge #2:  The Card Sketch
Beginning in January, we have featured card sketches that we hope have offered some variety for you to work with!  This month again we feature a sketch from Pagemaps!

Challenge #3 The Layout Sketch
 Beginning in January with a sketch featuring 4 photo spots, we have featured a sketch each month with a decreasing number of featured photos on each sketch! And now we come to April and a 1 photo feature!  This sketch was supplied by Pagemaps!

http://www.pagemaps.com/

I went with the theme and this is what I created.
8x10 mixed media canvas.
Large heart doily with flower cluster. 
The chipboard is from Blue Fern Studios

The background is created with Gelatos, blotted with paper
towels for a mottled effect.
Stamping with Solvent ink .
Acrylic paint through a Stencil Girl stencil.
And more stamping with a clear acrylic stamp and paint.

The chipboard was covered with Lumiere 3D paint by Jacquard.

Make sure to head over to the 
and see what all the Design Team members have created.

Link up your project for a chance to win one of these prizes...


Below you will see the 3 prizes our Design Team has provided this month!

   Prize #1:

Prize #2:

Prize #3:


Challenge Rules:
You may create and enter separate projects for the theme, layout sketch, and card sketch challenges, or you may combine the theme with the sketches.  You may enter as many unique projects as you wish, as long as they meet the challenge criteria.  You may combine these challenges with as many other challenges as you like.  ***You MUST mention this challenge, Scrapping Everyday Miracles, and LINK back to our blog, in order to be eligible for a prize or badge honors. We encourage you to use one of the Bible verses in your project and become a follower of our blog! No backlinking - new projects only!  Link your projects in the linky tool on the top right of the page!

Thanks for stopping by and have a great day!