Showing posts with label Scrapbook News and Review. Show all posts

Friday, January 10, 2014

Layout share

Had to get up up before the crack of dawn this morning 
to take the oldest back to college, 
for those of you who routinely get up at 3:30 am, I am in awe.

So I thought I would share some layouts which have
all been featured in the
Scrapbook News and Review magazine.


The first is me and my husband on my 40th.
Lucky me, he took me to Paris for the week and this picture was snapped by a bystander.
It doesn't use a lot of paper. One 12x12 piece of card stock
misted with Lindy's Stamp Gang Buccaneer Bronze over
a Christy Tomlinison stencil.
Few pieces of scrap paper, piece of torn corrugated cardboard, and some clear number tape and it is done.
I ran out of E's but the number 3 fits in in a pinch.

This is the oldest & one of our German exchange students.
We have been lucky to now have had to very wonderful girls come and stay with us from Germany.
The hosting of exchange students has created some life long 
friendships.
Patterned paper with mist through a Stencil Girl stencil.
some Washii tape and rick rack were layered under the photo,
and a cluster of Petaloo flowers and leaves added.

Last but not least,
is Me at 41.
I've done so much and still have so much to do.
The layout was created using a sketch that the magazine provided.
Prima flowers, a doily, paper pleats, and wooden tags
all are added as embellishments.

Time to hit the road,
hope you all got to sleep way later than me this fine rainy morning.

Thanks for stopping by and have a great day.

Tuesday, November 12, 2013

Just sharing some layouts today


Sharing some layouts today that have all been featured in
Scrapbook News and Review.
They feature my favorite subjects (the girls), and are mixed media and layered
papers.

Alles ist Gut
is done on a piece of craft card stock.
Gesso was scraped through a Stencil Girl stencil, as well as dripped onto and painted
around the page.
Some Lindy's Buccaneer Bronze mist was also added and dripped down the page.
A few scraps of paper, including a brown shopping bag were layered under the photo.

Forever and Ever
When the little one was small she used to hold everyone's ears, 
both to comfort herself as well as when she saw others in distress.
I caught the 2 youngest in the act one day. The baby was comforting her big sis. No matter how they fight (and boy do they fight!) they will always be there for each other.
Lots of distressing, paper layers and machine stitching on this page.

Lovely Smile
Some paper layering, misting through a Crafter's Workshop stencil and using some FabScraps chipboard to create this page.
The large SMILE is a Kaisercraft rub on.
Try placing them over a large spot on your photo. They'll look like you took the pic just for them.

Thanks for stopping by and have a great day!

Friday, September 13, 2013

ATCs, a Tag and a Card


Today I'm sharing several pieces which were recently seen in
Scrapbook News and Review.

While I tend to work on bigger things like scrapbook pages, art journal
pages and canvases, it's always fun to occasionally go down in size.

The first piece is a simple sympathy card.
The base is watercolor paper, layered with Washii tape and book text.
Colored with Lindy's Stamp Gang mist.
The chipboard is from Dusty Attic.


Next I have an ATC created on a Gelli print base.
I save all bits of leftover prints, and ATCs are a perfect way to use them up.
The stamp is from Hero Arts, stamped with StazOn ink and colored with Faber Castell Big Brush pens.
A white gel pen was used to add accents.


The next ATC is done on a base of pape rtowel leftover from cleaning my desk.
(yes I save EVERYTHING)
Stamped onto it with a script stamp.
Added the sentiment and a chipboard sticker from Pink Paislee. 


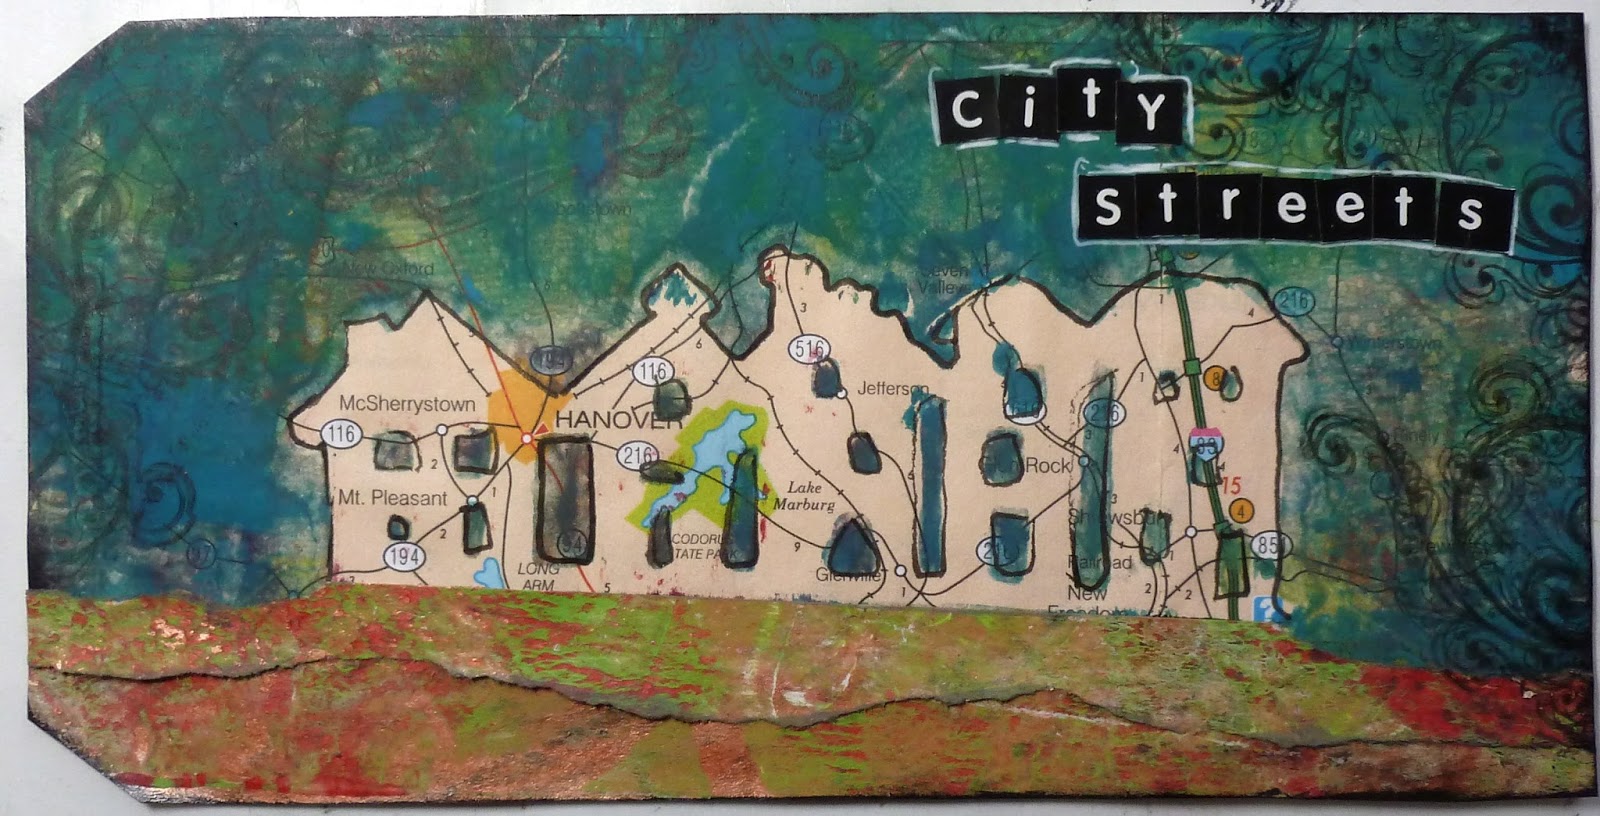
Here is a tag done on another Gelli print done over an old map.
I outlined the buildings and added more torn Gelli prints for the ground as a contrast.


Last but not least is my RED ATC
done for the color theme.
I just collected red items found on my desk and collaged them onto my base.


Thanks for stopping by and have a great day!

Tuesday, September 3, 2013

I Scored a Goal

No doubt about it I am A Soccer Mom.

My daughter plays on a Club team and the State team.
We spend everyday at a training facility or at a game.
Soccer is her passion and I take great joy in watching her live it out on a daily basis


This layout was featured in a recent issue of Scrapbook News and Review.
The quote was found in a magazine and the paper is 7 Dots Studio.

Oh..
and what exactly does scoring a goal feel like for her?

Check out the look of pure joy (and fallen defenders) as she scores the first of the season.

I know , I know, could have been better framed but when you are jumping up and down and cheering you have to go with what you have.

Thanks for stopping by and have a great day!


Thursday, August 29, 2013

ATCs, Inchies and Arches

Sharing a few pieces that have been recently published in
Scrapbook News and Review.

The first is an ATC created on a Gelli print.
The image is from a piece of 7 Gypsies paper.

Next is a Steampunk Gothic Arch.
Going really small for these inchies.
The backgrounds are tissue paper for texture then paints and mists for color.
and last but not least...
Another Gothic Arch
this one was inspired by a fortune from a recent visit to a Chinese food restaurant.

The background was another Gelli print
covered with some stamped and embossed images


    Thanks for stopping by and have a great day!

Saturday, June 29, 2013

Cherish

Another layout to share which was recently featured in the April issue of 
Scrapbook News and Review.

Kaisercraft paper was crumpled and distressed along the edges.
A whitewash of Gesso applied over the pattern to tone everything down.

My photo was adhered to the page and then Moldeling Paste applied along 2 of the corners and out a bit.
I used a palette knife and frosted the paper almost like a cake to get some peaks and valleys.
When the paste was dry I added some color with Silks Acrylic Glazes then stamped all ver the page with a Recollections scripts stamp and Staz On in Jet Black.

The hexagons are stickers from Kaisercraft.
After placing them down I outlined each one with a charcoal pencil and smudged it a bit with my finger.
The chipboard flourishes are from Dusty Attic.

A little flower cluster with the additions of some metal trinkets I had in my stash.
There is also a bit more stamping with a "noise" stamp from Club Scrap.


Thanks for stopping by and have a great day!

Saturday, June 22, 2013

Keep your feet on the ground...

Just doing a quick share today of a layout featured in the April issue of 
Scrapbook News and Review.

The patterned paper is from Kaisercraft. 
Gesso was used around the photo to blend it into the background.
Stenciling using a Crafter's Workshop stencil and Golden Fluid Acrylics to create the diamond pattern.
A handmade banner and doily cut in half finish off the layout.

Thanks for stopping by and have a great day!


Monday, June 10, 2013

My Routine

A while ago one of the calls at Scrapbook News and Review was "routine".

How could I show my routine when I really didn't have one. Our day to day schedules are varied, depending on school stuff and soccer practices.
Then it hit me, the one constant thing I do each and every day is read the paper.
Yes I know there are online versions (and I rad several) but my favorite part of the day is each morning when I sit down with my cup of coffee and read the local paper.

Now how to show that, I could have just taken a picture of my coffee & paper, which I did, and scrapped it. Yet I wanted to do more. I wound up integrating the entire paper into my layout.
I tore the paper into pieces, keeping headlines of the day rather whole, and using Gel Medium collaged them across a piece of card stock.
Once the card stock was covered I trimmed the edges and gave the whole thing a light covering of Gesso to tone it down.

Misted heavily with Lindy's Stamp Gang Moonshadow mist to add some color and major drips down the page.
The coffee "spills" were stamped and then embossed to give it more texture.

Coffee rings and beans were also stamped across the page tying in to my theme.

When I was done I had a fun page documenting something I do daily. Not only that if you get close to the page you can actually read a bunch of the headlines of the day. Yet one more way to scrap life.

Thanks for stopping by and have a great day.

Thursday, May 30, 2013

Scrapping in different sizes

Mostly I scrap in a 12x12 format.
I like the size, there is plenty of space to work and it fits neatly into my albums.

That being said everyone once in a while I like to try a different size; my favorite being a 6x12" page.
Room to work but the different size really gives you pause. 
I don't do many but slowly I am filling up an album of just this sized layouts.

Both of these pages have been featured in Scrapbook News and Review.


On Spread Your Wings I used Prima paper and Washi tape.
The page size really lets me showcase the happy look on my daughter's face without needing to add a lot of extras.
On Smile I used a bunch of scraps, again the size lets you use up even the smallest bits of paper.
The girls were so goofy this day, we were down in Disney World for a soccer tournament.
Florida should be warm...right?

WRONG!!!
It was 29 degrees on the first day.
BRRRRR!


Next time you are trying to jump start your mojo why not try scrapping a 6x12 format, you may get hooked.

Thanks for stopping by and have a great day!

Tuesday, May 28, 2013

Everything has beauty...


So here I am in the middle of writing up a product review for Scrapbook News and Review.
I was talking about Silks Acrylic Glaze and figured the best way to show what I meant was to put a bunch on a piece of paper.
Now I just took a hodge podge of colors and started slapping them down over an old dictionary page.

Great, I had my sample for the review but now what. Some of the colors went together fantastically, others eh.
So I began to play.
First I rubbed some Old Road ink from Prima through a Crafter's Workshop stencil.

I pulled out a stamp set from Unity Stamps and stamped the large flower.
My black StazOn is drying up so the image wasn't that great. Out came my Sharpie where I traced over the stamped image, then it was colored in with Faber Castell Big Brush Pitt Pens.
Finally went over it with a white gel pen.

closeup of my flower

                                         Thanks for stopping by and have a great day!

   Oh; and if you are interested in what I have to say about the Silks...check out the June isse of Scrapbook News & Review, coming soon.

Monday, May 13, 2013

Scrapbook News and Review May issue


May issue
Volume 6 Issue 5

IS NOW AVAILABLE!


Jammed packed with eye candy galore.
Inspiration and tutorials to help get the mojo flowing.

Head on over and check it out today!

Tuesday, April 30, 2013

Cards galore.

Every once in a while I get into a card making mood. 
I have to admit that cards are not my favorite form of paper crafting, but there are special people who I will actually take the time and make one for.

Today I want to share a couple that I have done up recently...

Some were featured in Scrapbook News and Review, others were for a recent swap over at Flying Unicorn ( have yet to meet a swap I don't like lol).

This one was featured in SNR. I bought a kit of epherma on Etsy that was color coordinated, I wound up using bits and pieces to create this card.

This card too was featured in SNR. The call was to use Inchies on a card. I stamped the Queen's Anne Lace (Club Scrap) and cut it into 4 1x1" pieces. Just a little bit of layering and distressing to finish it off.

This card was featured in SNR but I made it as a sample for my All About Resists class over at The Art Studio.
The stamps are all by Club Scrap.

Another card featured in SNR but also made as a sample for my All About Resists class over at The Art Studio.
The stamps again are from Club Scrap. Ranger embossing powder and Distress inks for color.

This card was for a swap at The Flying Unicorn.
The background is book text misted with Lindy's Stamp Gang mist, then stamped with Stone Grey Solvent ink.
The butterflies are Maya Road, misted then embossed with clear ep. The sentiment was stamped onto a small piece of Washi tape.

And finally;
a Happy Birthday card using up a bunch of scraps. Gessoed then stamped on, the image colored with Faber Castell Big Brush pens. Stickles were added to the flowers for a bit of glitter


  So that's the card share for today. I think I'm going back to 12x12 pieces for a while, I do like my larger pieces lol.

  Thanks for stopping by and have a great day

Monday, April 29, 2013

Cast your spell...


Ok, Ok
I know it's no where near Halloween but I wanted to share this layout I did for Scrapbook News and Review.
My attempt to show that you DO NOT need to so layouts on just paper.

The base of this layout is a piece of 12x12 cradleboard (most art supply and big box stores sell them).
I love working on wood, it doesn't warp, bleed, buckle or fall apart no matter what you do to it.

   I first covered the board with a layer of Black Gesso. The great thing about Black Gesso if you have never tried it is how quickly it covers and dries. It provides a different spin on the traditional White Gesso.
 
  It is then spray heavily with Lindy's Stamp Gang (Ghostly Gargoyle White) mist. Hard to tell in the photo but you can sort of see some of the drips. The tag and Tattered Angels frame were misted with LSG Witch's Potion Purple mist, and the background of the title is LSG Hag's Wort Orange.

  I layered a piece of German text and a scrap of striped paper under my photo. Stamped some flourishes and bats with silver ink and finished it off with a large black spider, a strip of tulle and a key.

 I crack up at this picture, what you can't tell (but might get a sense of) is that the little one is chewing me out for delaying the start of trick or treating. She'll usually pose willingly but not if it is standing in the way of free candy.


  Thanks for stopping by and have a great day.

Thursday, April 25, 2013

Layouts to share....

I've spent the last 10 days entertaining a visiting Mother AND Mother In Law, which unfortunately hasn't left me much time to play.
I thought I'd share some past layouts today.
All have been featured in Scrapbook News and Review.


In this one I just misted heavily in one spot and blew it out with a straw.

This is the look you get when you have been traveling across Europe for several weeks. They will willingly pose only so long and then....

Just the baby girl, she ALWAYS is happy to pose.
Everyone leaves tomorrow and then I get my craft room back, YAY.

Thanks for stopping by and have a great day

Friday, April 19, 2013

Distressing a card


If you ever look at my scrapbook layouts, you can immediately see how much I enjoy distressing my papers.
This isn't limited to layouts though, you can distress the papers on your cards just as easy.

Today I would like to share a quick tutorial on distressing papers for a card to create a shabby chic finished piece.
This tutorial was previously featured in Scrapbook News and Review.

Supplies 
Brown ink
Brown mist
several coordinating papers
Distressing tool
Make a card base 5x7 and set aside. Cut a piece of patterned paper 4.75 x 6.75" and distress all sides. Ink with the brown ink.

Cut a piece of a 2nd patterned paper 4.50 x 6.50". Again distress the sides of the paper, tearing into it heavy in some spots. Ink the edges with the brown ink.

Layer the second piece of paper on top of the first. Using your blending tool to apply more ink in spots on the paper.

Cut a piece of patterned paper 4x6", cut another piece 3.75 x 5.75".
Distress all the sides of the paper, tear in spots, then ink.

Layer the papers onto your stack.

Cut a neutral piece of patterned paper about 3x5" and distress all the sides. Ink the edges and use your blending tool to apply more ink to the top of the paper.

Add it to the stack, layering and making sure all layers are visible.

Mist the stack with brown mist. Adhere it to your card base.

Add a focal image (here I cut a butterfly from a piece of patterned paper), your sentiment, and a bit of fiber tied on the side.

Thanks for stopping by and have a great day!