Showing posts with label Tattered Angels. Show all posts

Tuesday, January 5, 2016

January Hop with Craft Hoarders Anonymous

Welcome everyone to the January Hop 
with the Ladies of
Craft Hoarders Anonymous.
Every month on the 5th a group of us will share inspiration
on how to use up your hoard.
Since this post is happening right after the Holidays hopefully many of you
received new supplies to play with.

You should be coming here from Karen's blog.
After head back to Gloria's for the full list or to start at the beginning.


Today I am sharing an Art Journal
page I created using masking tape, my hoarded mists, some stamping,
and machine stitching.
I recently watched a video on YouTube by 
Magda Polakow which inspired my page.


I used mists from Lindy's Stamp Gang and Tattered Angels for color.
Black Gesso added after to tone down some of the white that still existed.
Seeing as I was working on scraps of paper from the scrap bin I needed to sew them
together into my final page.
A few word stickers and a new page for the beginning of 2016 is done.

Below is a list of all the other blogs to visit.
Make sure to check out what everyone has created to kick off the New Year.

Thanks for stopping by and have a great day!


Monday, March 9, 2015

Craft Hoarders Anonymous March Challenge...GO GREEN!

     It's time for another challenge at Craft Hoarders Anonymous, but before we get to it please make sure to read the following announcement from Gloria (our Chief Hoarder)....

    Dear Friends. It's Gloria here. I am so sorry to tell you that this will be the LAST Craft Hoarders Anonymous Challenge. After the March Challenge ends, we will NOT be posting more challenges. I started this challenge blog as a way to keep busy while I recovered from an injury. Once I started to feel better, I started to take on more design work, and now I am over-burdened (again). I am still suffering pain and lack of mobility due to the injury, and once again, I need to down-size my crafting work. In an effort to make the best choices for myself, for my family, and for my finances, I have decided to close the Hoarders blog. This has been an amazing 14-month journey! I have the best team of ladies to work with! They are all so very talented. I have gotten to know some of our regular Readers and have discovered new artists. It is very painful for me to have to say good-bye. The blog will remain up on Blogger for a time, to allow people to derive inspiration from the work posted here. But, folks, this is our last challenge. 

Please play along and visit with us one last time! We will pick Favorites for March, as always. Thanks to each of you for your support this past year! It has been a blessing! You are all welcome to visit me at my Scraps of Life Blog, where I may have some surprises up my sleeve starting in April. Happy spring!

Go Green
Use this color board as inspiration for your green challenge. Make a challenge which has green as the predominate color. Use the other colors in this color board as your accent colors. You may make any type or theme of project that you wish. You do NOT have to use all of the colors represented here, but green must be the star of your project! There must be some green in your vast hoard...dig it out!

(Color inspiration by Design Seeds)

and now my final DT piece for the blog...

Supplies:
Silks Acrylic Glaze
Tattered Angels Plain Jane mist
Distress Inks
Distress Marker
Paper scraps
BoBunny Stamp
Doily


Make sure to visit the Design Team members blogs to see how they have 
Gone Green.

Monday, January 12, 2015

Kicking off the new year with a Craft Hoarders Anonymous challenge

Happy 2015!
It's time for a new challenge at 

This is a fun one for sure;
CHOOSE YOUR CHALLENGE!
Create any type or style of project you wish, as long as you pick ONE (1) item from each category in the chart below! Choose your cardstock, printed paper, or other base (box, canvas, tray, etc.). Next, choose your adhesive. Finally, from the chart below, choose your coloring medium, fiber, technique, texture, and embellishments for your project! The combinations are almost endless! (You may choose more than one item from each category, but you MUST have AT LEAST ONE from each!) Have fun, and welcome to a NEW YEAR at Craft Hoarders Anonymous!

Here is the chart to choose from...

This is what I have made using the above chart.
I used the Beloved kit from Swirlydoos to create this layout of me and the youngest.
From the list I have;
Spray Mist, Paint, Twine, Stamping, Distressing Tool, Chipboard, Metal,
Flowers, Buttons, & Bling.
Whew!

Supplies:
Kaisercraft paper & Die Cuts
Prima Crystals & Flowers
Tattered Angels Mist
Blue Fern Chipboard
Twine, Metal, & Gesso

Views of my dripping mist, chipboard & twine...


Make sure to visit the Design Team members blogs
 to see how the have worked with this challenge.


Wednesday, December 3, 2014

Sketchabilities #128….Smile like no other

Another sketch has been released over on the 

This is an awesome sketch just begging for a mixed media background.
Disclaimer
the layout I am sharing is the 2nd one I created with the sketch,
The 1st one was completely ruined when I was putting finishing touches on it and knocked over a brand new top off bottle of Dylusions mist…I'll pause while you all take a moment to groan lol.
Yet in the end I am far happier with version 2.
Meant to be I guess.

Anyway,
here is the sketch.

This is my take on it.
The background paper is from 
Blue Fern Studios.
I've worked with lots of their embellishments before but never the paper.
It holds up amazing to all the wet elements I put on.

I first added pattern with a Crafter's Workshop stencil and 
Distress Ink in Faded Jeans.
My foam pad on the blending tool wasn't clean so I unintentionally got some cool shading.
Then did some stamping using several background stamps and StazOn in black.

My title is made of letter stickers and Tim Holtz word stickers.

I used Modeling Paste with a Prima large stencil for the roses & vine.
When it was dry I added some Pan Pastel in Turquoise for color.
Wanting to highlight a bit more I added some color from a Spectrum Noir marker
and then with a q-tip dipped in blending solution took most of it off.

Some light misting with Tattered Angels Glimmer Mist
in Slate.
Then more blobs of the same mist by flicking the tube.
Some Dresden foil trim, Tim Holtz rub ons, thread remnants and Prima gems finished it off.

Make sure to check out the 
Sketchabilities blog 
and see how others are interpreting the sketch.

Thanks for stopping by and have a great day!


Wednesday, November 19, 2014

Sketch 127 at Sketchabilities…Live a Beautiful Life


Sharing a layout today that was created using the
new sketch from 

This is sketch 127...
and this is what I created...
The background was an old piece of scrapbook paper covered with Gesso 
and Modeling Paste spread through a 
Crafter's Workshop stencil.
When it was dry pieces of drywall tape were added for even more texture.

Color was added first in the form of Tattered Angels Glimmer Mists
(Antique Brass, Crushed Shell & Latte)
Once the mists were dry 
Liquitex Acrylic ink in Turquoise Deep was dripped on then misted with water.
Tipping and tilting the paper allowed the color to go all over.
Dry again and then randomly swipe the paper / paste with VersaMark embossing ink, cover with 
Byzantine Bronze embossing powder from 
Lindy's Stamp Gang and melt.

The leaves are all Kaisercraft wood pieces covered with the
same Byzantine Bronze powder as what is on the background.

The little sparkly blue balls are from Petaloo pull apart clusters.
I went one step further, pulled apart and then cut.

Here you can see the texture from the paste, tape and embossing powder.

I am in love with how the acrylic ink is playing with the raised texture of the background.
Might need to do this in my art journal next!

Thanks for stopping by and have a great day.


Tuesday, November 18, 2014

Make a Mess..an art journal page.

It's another day of playing without and end result in mind.

This page was inspired by Song Li on 
the Flying Unicorn forum.
She created such a fun bold piece that immediately caught my eye and had me wanting to create.

This is what I created today.

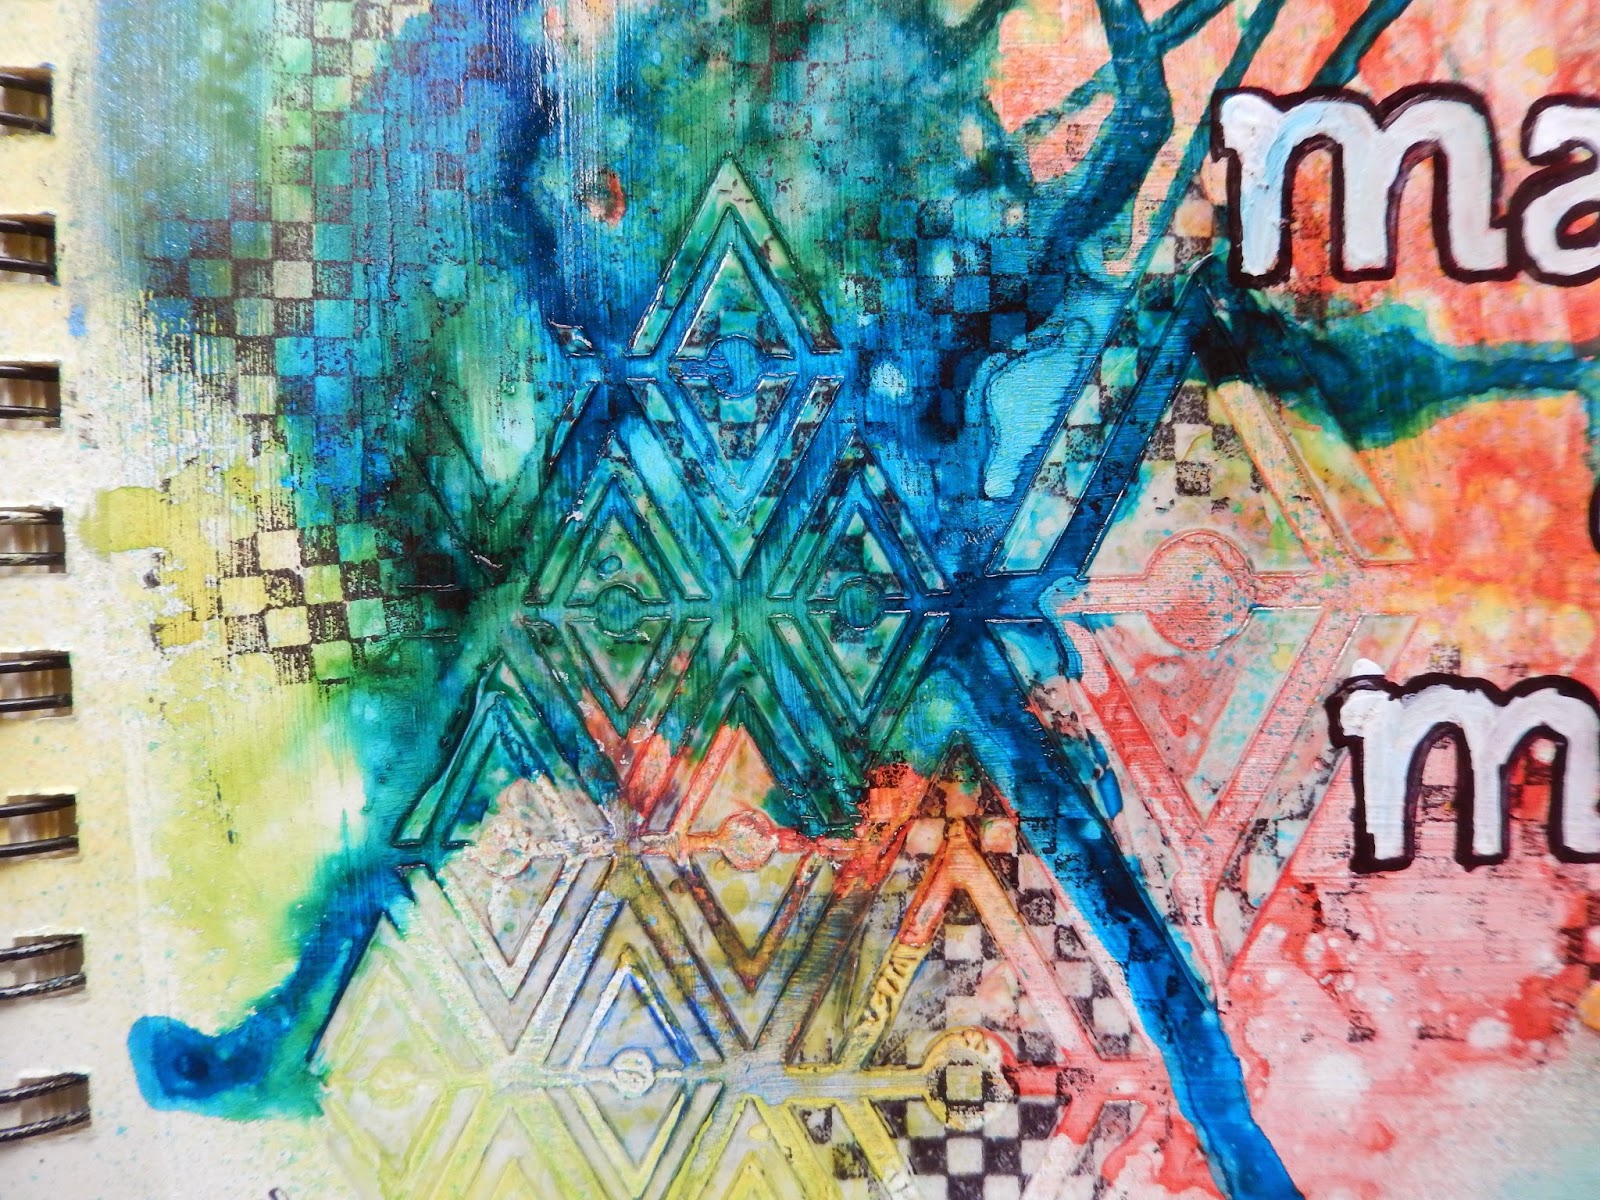
I covered my page with Gesso and let dry.
Then using a spatula I spread Gel Medium through a Crafter's Workshop
diamond stencil.
The medium will act as a resist for the water based mists I was planing on using once it is dry.

I used 3 coloring mediums here:
First I randomly misted with Heidi Swapp's ColorShine in Georgia Peach.
I love how the mist looks on the Gesso, almost mottled in appearance redder in some places, orange in others.
Making sure to dry the page completely before the addition of more color.
Then I dripped Ayeeda Ink in Sky Blue onto the page & misted with water.
The Ayeeda Ink is water based so the addition of more water caused it to drip and pool in places.
LOVE IT.
You can also see in spots where it traveled around the Gel Medium texture.

After drying the piece completely again I misted in spots with Tattered Angels Plain Jane Baseboard mist in
Plain Daffodil.
The yellow added an extra pop of color as well as mixing with the previously applied colors.
I used my heat gun before the last mist could reactivate the others too much.

Some stamping with a check stamp and StazOn ink.

The title was created by placing stickers down, tracing with a Sharpie marker, and then removing the stickers.
Using a fine tip paintbrush and Gesso I colored in the letters.
I had to go with this title, as I was playing I definitely made a mess, 
but it was oh so fun.

So go ahead…make a mess :)

That's it for today.
Thanks for stopping by and have a great day!

Thursday, November 13, 2014

Swirlydoos and the Treasured Yesterdays sketch

Sharing a layout today using the 
Treasured Yesterdays kit from Swirlydoos 
as well as the sketch.

This was the sketch included in the kit.
The sketch challenge runs until Nov 15 so I'm doing a happy dance.
I never get the sketch's done in time.
I did this month…whoo hoo!
Here is my layout.
Almost everything used came in the kit.
I added some mists, stamps, and in from my stash.

The background paper is from Prima's Epiphany collection.
Some misting with Trunk Bay Glimmer Mist by Tattered Angels.
Black ink through a Dylusions stencil and stamping using a BoBunny & Kaisercraft stamp.

The large chipboard circle is from Blue Fern Studios
I colored it with Aqua Stained Glass medium from Tattered Angels and then misted with Slate Glimmer mist.
Holding my heat gun close I managed to make it bubble up a bit for more texture.
The flowers, wood pieces and clock stick pin all come from Prima as well.

Some lace was layered under the photo
 along with some journaling cards from Prima.
Prima sparkly gems were scattered across the page to finish it.
Some torn Fancy Pants corrugated cardboard was layered with the Prima papers 
for a pop of color.


Make sure to check out the the thread
on the forum to see other interpretations of the sketch.

Thanks for stopping by and have a great day.


Tuesday, November 11, 2014

It's all white now….and it's harder than it sounds!

So while I was checking out the challenges this month on the
I came across one hosted by Denise called
Ok
My interest is peaked.
The rules:
 Your layout must be all white. Off white is ok and so is ivory but no color!
 You must use a black and white or sepia photo. No color pictures.
 You must use a stencil
 Must use Gesso, molding paste, or white paint.
 Must have at least 7 flowers.
Must have at least 1 embellie

I knew no matter what other challenges I did this month I HAD
to do this one.
It really is a challenge!

First off I had to find some white paper. 
Seeing as I apparently have used every piece of printed white paper I created my own background design on a piece of Bazzill Basics.
Using a large crackle stamp by Impression Obsession and white
embossing powder I created an all over background pattern.

My 7 flowers were a combination of fabric ones cut off a strip of tulle
and some Petaloo ones. 
The center beads were gold and I repainted them White with 
High Impact paint from Tattered Angels.

Modeling Paste through a Club Scrap stencil.
I heated it with my heat gun to get a bubbly sort of grunge effect to go with my photo.
You can see the embossing really well in this shot too.
The Moments title is a clear Prima sticker.

more embossing and paste.
You can also see where I melted the edges of my photo in spots,
started as an accident but was a happy one.
The melted edges so fit the photo.

Lace was layered under the photo 
and 2 stick pins were added as embellishments.

And this is my all white layout.
It was most definitely a challenge once I got going.
This girl needs color!

Make sure to check out the challenge thread 
and see how others are going all white.

Thanks for stopping by and have a great day!

Friday, October 3, 2014

Sisters

It's Friday (YAY)
and I'm ready to kick off the weekend with this piece.

Sharing a layout today created using the September kit from 
I love how everything included just always "works" for what I want to create.

I took a pic of the 2 youngest on the first day of school.
(yes it was 2 months ago but I get distracted, or maybe I was just waiting for the kit)
They fight like cats and dogs most days but that morning it was all hugs and kisses.


The background paper is from Prima and Kaisercraft.
There is also a torn piece of free paper from an old Somerset Studio magazine under the photo.

Prima tags, Prima flowers, lace, clocks from Maya Road and cork hearts from
American Crafts.

Hard to see but there is a piece of Blue Fern Studios chipboard 
covered with Black Glitter Glue
and layered under the photo as well.

more clustering…
Some stamping and stenciling with a Crafter's Workshop stencil.
2 different Glimmer Mists were used on the background as well.
Mostly because half of my sprayers weren't working today, and ones that did quit half way through.
Major frustration!

Thanks for stopping by and have a fantastic day!


Thursday, October 2, 2014

Art Journal page for today

Sharing another page from my Art Journal today.
I have a ton of this to do but as usual I'm more in the mood to just mess around and create just to create.


This one started as a sheet where I had cleaned stencils off from another project.
If you look closely you can still see some of the patterns on the bottom layer.

Followed by layering both sewing pattern tissue paper 
as well as polka dot tissue paper.
Some stamping with a Tim Holtz stamp and StazOn ink.

More misting with Dylusions mists to add some pops of color.
Followed up with some Stained Glass glaze medium by Tattered Angels.
Love how it is sheer enough to let everything under show up but still adds some vibrant color.

The stars are created using a Crafter's Workshop stencil and white acrylic paint pen.
The center piece is a tag from Canvas Corp.
It's also colored with the Tattered Angels glaze medium.
Heavy at the top and less at the bottom.

Now off to actually get some of my to do list done before the kids get home.

Thanks for stopping by and have a great day!

Friday, September 12, 2014

Art Journal page playing with Bister

The other day a friend shared some works she had created using
I was in awe of what she had done and at the same time decided I 
NEEDED them now.
Bister is wood stain imported from the Netherlands.
It's water soluble and on glossy or stamping paper can created absolutely beautiful backgrounds.

Doing a Youtube video search I found a few tutorials,
most in another language, and most on how to create cards and such by combining the Bister background with stamped images.

I am all about backgrounds, and I am all about stamping (but usually as part of my background making)
so I decided to share my spin on combining the 2.
The following is a step by step tutorial on creating this Art Journal page.


This is Bister.
It comes in 8 colors in these little containers.
Don't panic about the size, it truly is an example of a little goes a looooonnnggg
way.


See, it has fine grains, almost along the lines of an embossing powder.
I used a dry paint brush to flick a small amour across my page.

I wound up using 3 colors here.

Mist it with water.
The more you mist the more it bleeds and runs.
I'm in heaven.
Excess water can be blotted up along the edges with a paper towel
and you can dry with a heat gun to speed things up.

I added a second layer of color just because I wanted more veins of color in my piece.
Then some simple stamping with a Kaisercraft stamp and Solvent (StazOn) ink.

I put a tiny bit of the stain in a container, added some water and made a watercolor paint.

Using a cosmetic sponge and stencil I added some circles to the page.
In hindsight I'd use a different applicator,
the sponge soaked up more of the water than I wanted
(I know, who'd have thought a sponge would soak up water…duh moment)

My circles...

I outlined the circles with a white acrylic paint pen.

Added some torn pieces of a sewing pattern.

More stamping,
this time with a Tim Holtz stamp and Solvent ink.

Little bit of Washii tape,
cause tape makes me happy.

For my embellishment I took a piece of canvas and misted it with Olive Vine & Bronze 
Glimmer Mist by Tattered Angels, 
and Buccaneer Bronze Moonshadow Mist by Lindy's Stamp Gang.
Once it dried a little bit of stamping with a Club Scrap stamp and Solvent Ink.

I cut a heart out freehand, adhered it to the page and did a bit of machine stitching around it.

Here is the finished piece.
I added some words using Tim Holtz stickers.
Outlined the heart with a Distress Marker and smudged it with my finger,
and inked the edges of the page with black ink.

A few closeups….

Love my heart

Some of the Bister background with stamping over.

Thanks for stopping by and checking out my newest tutorial.

Have a fantastic weekend!