Thursday, November 27, 2014

Happy Thanksgiving….

Today in the 
United States is Thanksgiving.
A day for all of us to gather with our families and friends,
and give thanks for all we have.

I wanted to share an Art Journal
page I did a while back.
The quote seems especially appropriate right now.

We are supposed to be thankful on this day,
we sit at our tables and bow our heads praising all that we have.
We are lucky.
Yet my personal philosophy.
We need to be thankful EVERY day
Each new day is a day to count your blessings.

So today enjoy your friends, family, food, football
and maybe even shopping.
Be thankful for who you are and what you have.

And when you wake up tomorrow morning….

Count your blessings again.

Wishing you all a special day.

Thursday, November 20, 2014

Selfie Nation

Sharing a layout done today using the
November kit Beloved
from Swirlydoos.

Every kit comes with a sketch and challenge based on that sketch.
This is this month's sketch designed by the very talented 
Beggahuna.

This is the layout I created using it.
Almost everything on the page came from the November kit
which is featuring the fabulous Rustic Harmony collection by Kaisercraft.
The sketch was a wee bit tricky
and I did change it up slightly to work for me
but in the end I was happy.

I have lots of teenagers roaming my house,
and anyone with them knows their love for their phones, their cameras, and taking photos of themselves with their camera phones.
I caught this in action on July 4, 2014 and too me it just epitomized the age & times.

Their is a large piece of Blue Fern Studios chipboard covered with 
Lindy's Stamp Gang embossing powder in
Geranium Coral Blush.
The flowers are Prima and the pearls are Kaisercraft.

Lots of little die cuts also from 
Kaisercraft tucked in and around the photo.

Doilies popping up here and there.

So that's my take on the sketch.

Make sure to stop by the forum and see how others have worked with it.

Thanks for stopping by and have a great day.


Wednesday, November 19, 2014

Sketch 127 at Sketchabilities…Live a Beautiful Life


Sharing a layout today that was created using the
new sketch from 

This is sketch 127...
and this is what I created...
The background was an old piece of scrapbook paper covered with Gesso 
and Modeling Paste spread through a 
Crafter's Workshop stencil.
When it was dry pieces of drywall tape were added for even more texture.

Color was added first in the form of Tattered Angels Glimmer Mists
(Antique Brass, Crushed Shell & Latte)
Once the mists were dry 
Liquitex Acrylic ink in Turquoise Deep was dripped on then misted with water.
Tipping and tilting the paper allowed the color to go all over.
Dry again and then randomly swipe the paper / paste with VersaMark embossing ink, cover with 
Byzantine Bronze embossing powder from 
Lindy's Stamp Gang and melt.

The leaves are all Kaisercraft wood pieces covered with the
same Byzantine Bronze powder as what is on the background.

The little sparkly blue balls are from Petaloo pull apart clusters.
I went one step further, pulled apart and then cut.

Here you can see the texture from the paste, tape and embossing powder.

I am in love with how the acrylic ink is playing with the raised texture of the background.
Might need to do this in my art journal next!

Thanks for stopping by and have a great day.


Tuesday, November 18, 2014

Make a Mess..an art journal page.

It's another day of playing without and end result in mind.

This page was inspired by Song Li on 
the Flying Unicorn forum.
She created such a fun bold piece that immediately caught my eye and had me wanting to create.

This is what I created today.

I covered my page with Gesso and let dry.
Then using a spatula I spread Gel Medium through a Crafter's Workshop
diamond stencil.
The medium will act as a resist for the water based mists I was planing on using once it is dry.

I used 3 coloring mediums here:
First I randomly misted with Heidi Swapp's ColorShine in Georgia Peach.
I love how the mist looks on the Gesso, almost mottled in appearance redder in some places, orange in others.
Making sure to dry the page completely before the addition of more color.
Then I dripped Ayeeda Ink in Sky Blue onto the page & misted with water.
The Ayeeda Ink is water based so the addition of more water caused it to drip and pool in places.
LOVE IT.
You can also see in spots where it traveled around the Gel Medium texture.

After drying the piece completely again I misted in spots with Tattered Angels Plain Jane Baseboard mist in
Plain Daffodil.
The yellow added an extra pop of color as well as mixing with the previously applied colors.
I used my heat gun before the last mist could reactivate the others too much.

Some stamping with a check stamp and StazOn ink.

The title was created by placing stickers down, tracing with a Sharpie marker, and then removing the stickers.
Using a fine tip paintbrush and Gesso I colored in the letters.
I had to go with this title, as I was playing I definitely made a mess, 
but it was oh so fun.

So go ahead…make a mess :)

That's it for today.
Thanks for stopping by and have a great day!

Monday, November 17, 2014

Craft Hoarders Anonymous Challenge 20…BOX IT UP!

Welcome back!

It's half way through November (and 5 1/2 weeks until Christmas EEEKKKK)
and time for another challenge at 

Challenge 20:
BOX IT UP
Create some sort of altered box.
You can create a box from scratch or alter a pre-made one.
Your box can be made of paper, wood, chipboard, plastic or metal.
As long as you dig into your hoard to decorate your box you meet the requirements.
The box may be a decoration, a gift, a gift holder…whatever you decide, just
BOX IT UP!


This challenge the Design Team was given wonderful boxes by
          Eileen is a Designer member of the Craft and Hobby Association and currently serves as Vice-Chair of the Designer Council. Eileen is from the Washington, D.C. area where she and her husband live in their empty nest. The newest member her family is a vintage camper, which she is driving cross-country, teaching and crafting all the way.
      Eileen has designed a signature line of ScoreBoards™ Sizzix dies, which includes the every popular Artist Trading Blocks dies.
     Her tenth Sizzix collection was released in February. 2014!
This is the box I created using one of Eileen's boxes.

All sides are covered with art, hearts and little inspirational phrases.
I even dug into my hoarded stash of Gelli Print scraps to finish it off.
I can rotate it on a whim, always changing what I am sharing.

Feel free to scroll as I have tried to share photos from almost all sides…

Supplies:
Eileen Hull 3x3x3 box
Liquitex acrylic paint
Washii tape
Book text
Gelli Prints
BoBunny stamp
Solvent ink
Distress marker
Word stickers


This month we are also sponsored by

One lucky winner will receive this
If you haven't checked out Heather's store, make sure to do so.
Her collage sheets are awesome!

Last but most definitely not least, make sure to visit the rest of the
Craft Hoarders Anonymous Design Team
to see what they have done with the challenge.
                                                                      Glenda Brooks
                                                                     Gloria Stengel 
                                                    Jan Marie Ennenga (on vacation)
                                                                    Karen Zueger
                                                          Kathy Clement (on vacation)


After you have visited everyone head back to the Craft Hoarders Anonymous blog
and link up your box creation.
You have 2 weeks.

Thanks for stopping by and have a great day!


Saturday, November 15, 2014

Be You…BE BOLD!

Sharing another art journal page today.

This one was inspired by a challenge over on the
The Art Journal challenge is held every month and is always a favorite of mine to play along with.
Song Li is hosting this month and her challenge was to
GO BOLD.


Love it!
This was the first piece I created.
I combined Paint, Mist, Stamping, Modeling Paste, Stencils, Pan Pastels,
old felt flowers, cheesecloth, doilies, and last but not least dry wall tape.
PHEW….
I also thought I would share a bit of step by step as I went about creating.
Keep on scrolling to check it out.
To begin I adhered doilies, felt flowers,
cheesecloth & tape to my page.
I then covered everything with a layer of Gesso to give a neutral base.

Once the Gesso dried I misted the page with Vibez Jeni B Blue 
by Shimmerz paints.
Using a wet brush I spread color over the whole page,
then misted more to get some drips.

Did some large splatters with Liquitex Acrylic ink and a dropper.
As I dried the ink I blew it across the page some more.

Once all the ink was dry I stamped randomly with 
StazOn and a check stamp.

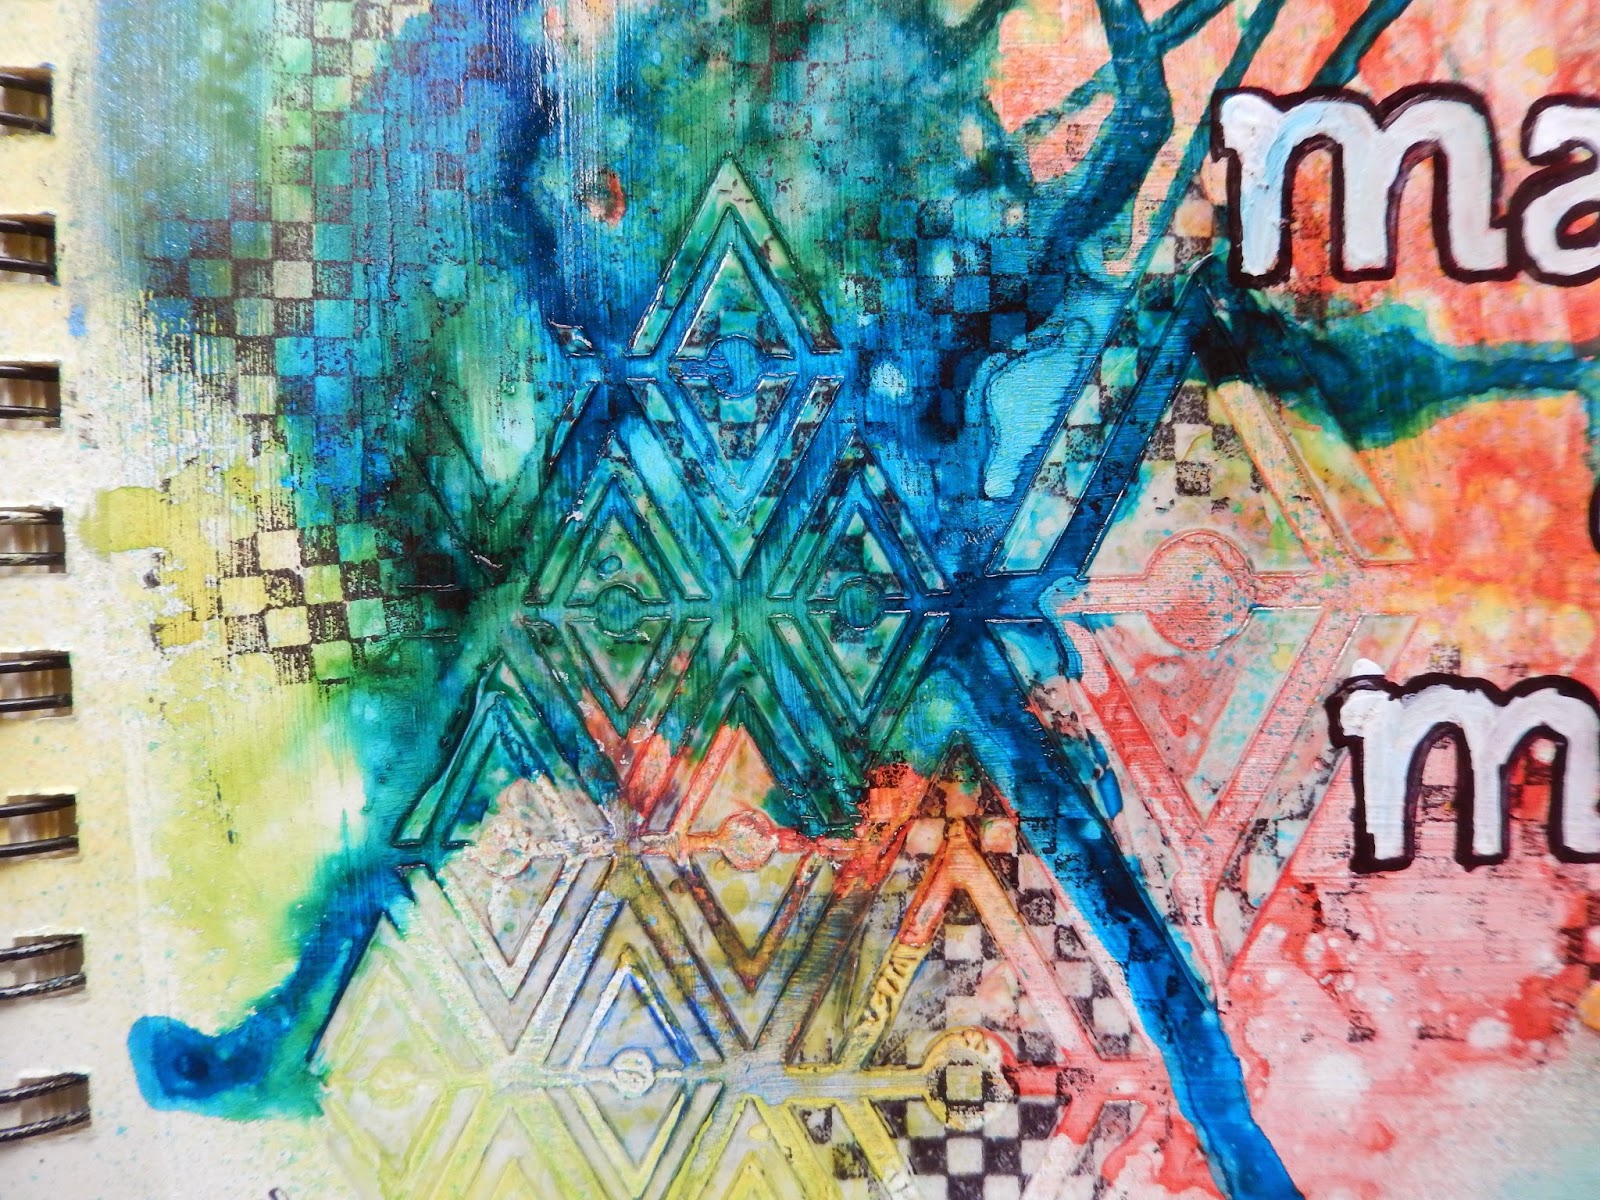
Modeling Paste through a Crafter's Workshop stencil.
I then dried the paste with my heat gun to give it a bubbly texture.
When the paste was completely dry I colored it with Orange Pan Pastel.
Since I knew I would add more layers I quickly sprayed the page with workable fixative.
This allows me to continue to layer but preserves the Pan Pastels as it is.

I took watered down purple paint in needle nose bottle 
and scribbled across the page.

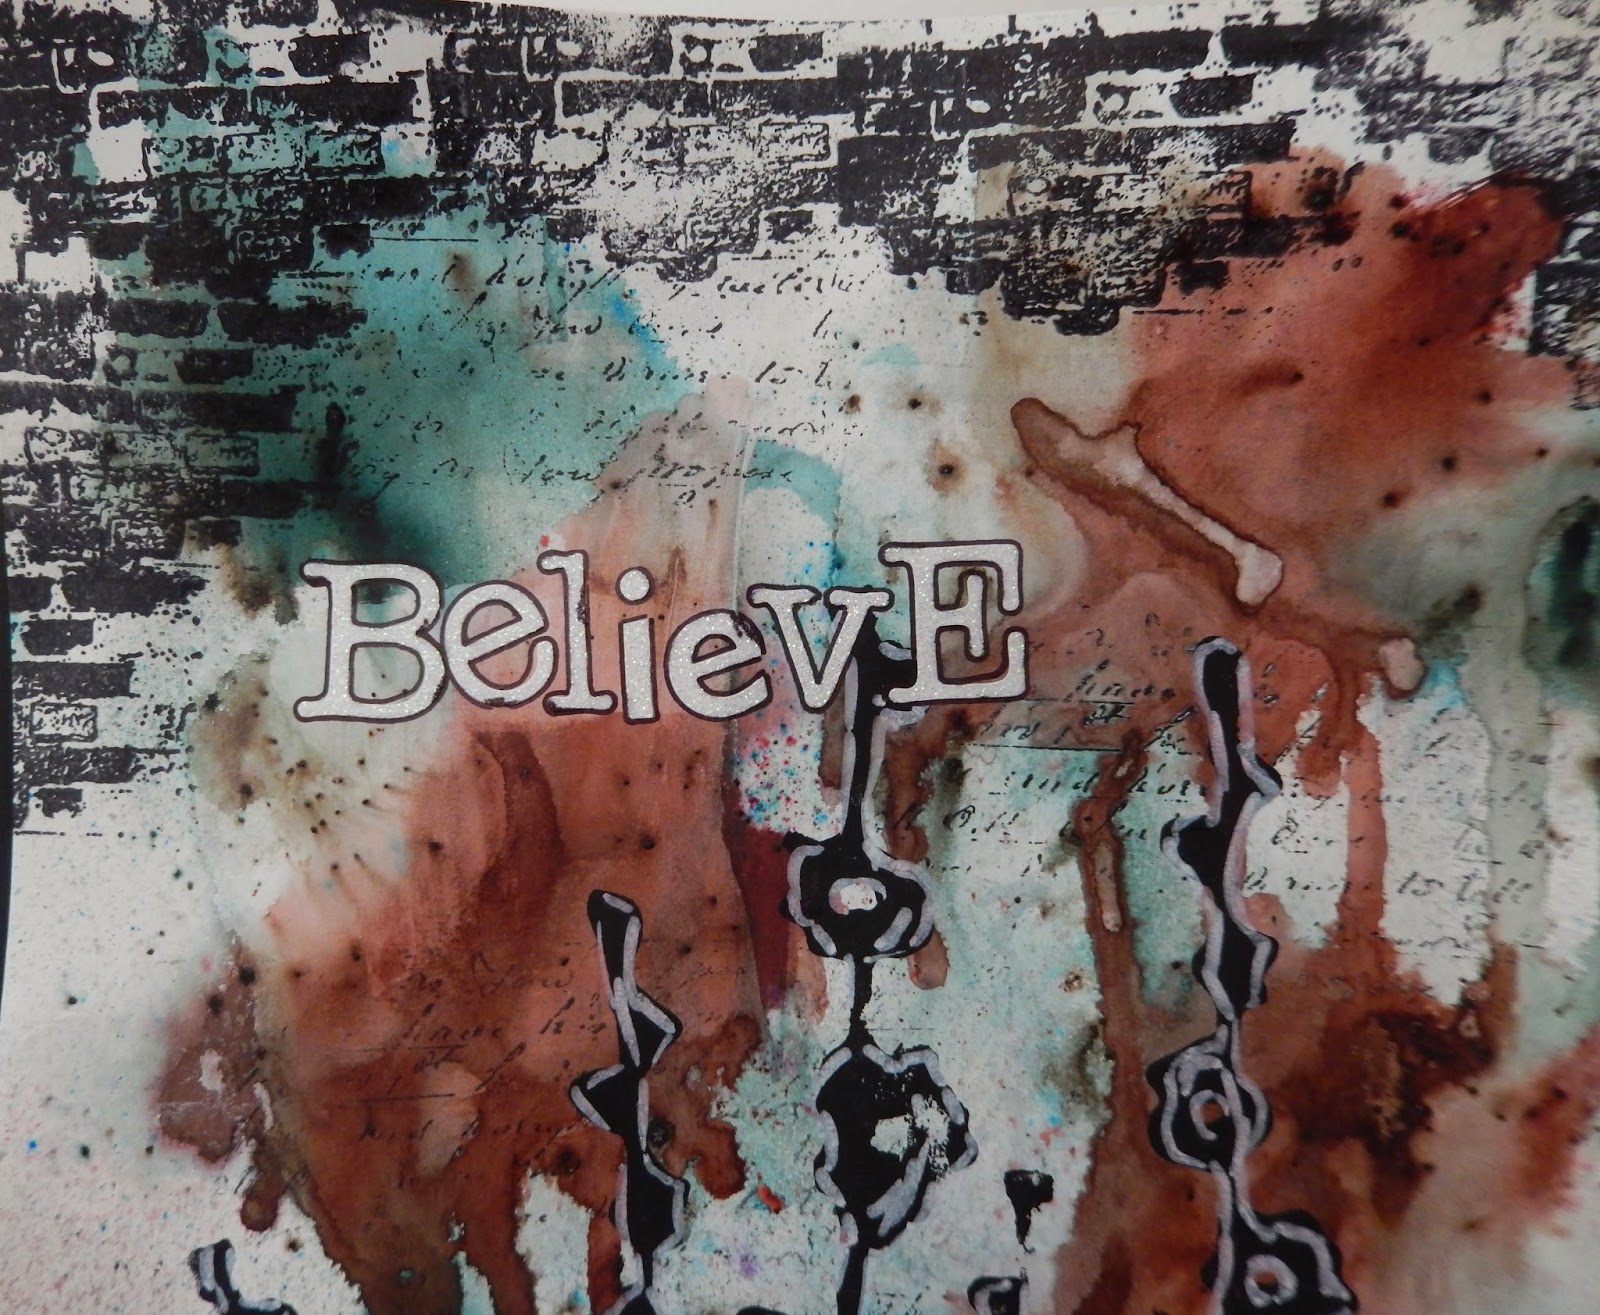
My letters were covered with black embossing powder,
melted then outline with a Montana Acrylic Paint marker

A few closeups….


And that is how I went bold today.

Make sure to stop by the forum and see how everyone else is doing.

Thanks for stopping by and have a great day!


Thursday, November 13, 2014

Swirlydoos and the Treasured Yesterdays sketch

Sharing a layout today using the 
Treasured Yesterdays kit from Swirlydoos 
as well as the sketch.

This was the sketch included in the kit.
The sketch challenge runs until Nov 15 so I'm doing a happy dance.
I never get the sketch's done in time.
I did this month…whoo hoo!
Here is my layout.
Almost everything used came in the kit.
I added some mists, stamps, and in from my stash.

The background paper is from Prima's Epiphany collection.
Some misting with Trunk Bay Glimmer Mist by Tattered Angels.
Black ink through a Dylusions stencil and stamping using a BoBunny & Kaisercraft stamp.

The large chipboard circle is from Blue Fern Studios
I colored it with Aqua Stained Glass medium from Tattered Angels and then misted with Slate Glimmer mist.
Holding my heat gun close I managed to make it bubble up a bit for more texture.
The flowers, wood pieces and clock stick pin all come from Prima as well.

Some lace was layered under the photo
 along with some journaling cards from Prima.
Prima sparkly gems were scattered across the page to finish it.
Some torn Fancy Pants corrugated cardboard was layered with the Prima papers 
for a pop of color.


Make sure to check out the the thread
on the forum to see other interpretations of the sketch.

Thanks for stopping by and have a great day.


Wednesday, November 12, 2014

Art Journal page with Bister

Sharing another Art journal page today.

This was created by first gessoing the page and then
pulling out my Bister stains to play.
These are so fun to play with.
By varying the amount of water you add you can alter the opacity of the colors.
Plus you get awesome drippage
Once the background dried I added some random stamping with a script stamp
and black Staz On ink.

The upper part of the page I added more stamping  to create 
a sort of brick wall.

The flowers are another old foam stamp.
Using black Gesso with it I stamped all over the page.
I needed a thick paint so when I used my white Faber Castell Pitt Pen it would't reactivate the Bister.
Using the Pitt Pen I outlined all the flowers and stems to make them pop a bit.


I am going to enter this in the 
where this month's challenge (#6)
is to use stamps.


Thanks for stopping by and have a great day!

Tuesday, November 11, 2014

It's all white now….and it's harder than it sounds!

So while I was checking out the challenges this month on the
I came across one hosted by Denise called
Ok
My interest is peaked.
The rules:
 Your layout must be all white. Off white is ok and so is ivory but no color!
 You must use a black and white or sepia photo. No color pictures.
 You must use a stencil
 Must use Gesso, molding paste, or white paint.
 Must have at least 7 flowers.
Must have at least 1 embellie

I knew no matter what other challenges I did this month I HAD
to do this one.
It really is a challenge!

First off I had to find some white paper. 
Seeing as I apparently have used every piece of printed white paper I created my own background design on a piece of Bazzill Basics.
Using a large crackle stamp by Impression Obsession and white
embossing powder I created an all over background pattern.

My 7 flowers were a combination of fabric ones cut off a strip of tulle
and some Petaloo ones. 
The center beads were gold and I repainted them White with 
High Impact paint from Tattered Angels.

Modeling Paste through a Club Scrap stencil.
I heated it with my heat gun to get a bubbly sort of grunge effect to go with my photo.
You can see the embossing really well in this shot too.
The Moments title is a clear Prima sticker.

more embossing and paste.
You can also see where I melted the edges of my photo in spots,
started as an accident but was a happy one.
The melted edges so fit the photo.

Lace was layered under the photo 
and 2 stick pins were added as embellishments.

And this is my all white layout.
It was most definitely a challenge once I got going.
This girl needs color!

Make sure to check out the challenge thread 
and see how others are going all white.

Thanks for stopping by and have a great day!