Wednesday, January 30, 2013

Swirlydoos Ultimate Designer Challenge WEEK 3


So it is time for week 3 of the Swirlydoos Ultimate Designer Challenge.
This week the challenge is to use METAL FOIL TAPE and incorporate it into your project somehow. Now I never do anything little and went in whole hog on this. I altered an 11x 14" canvas to create my piece.

Here is how I started...
First laying down a bunch of random objects.

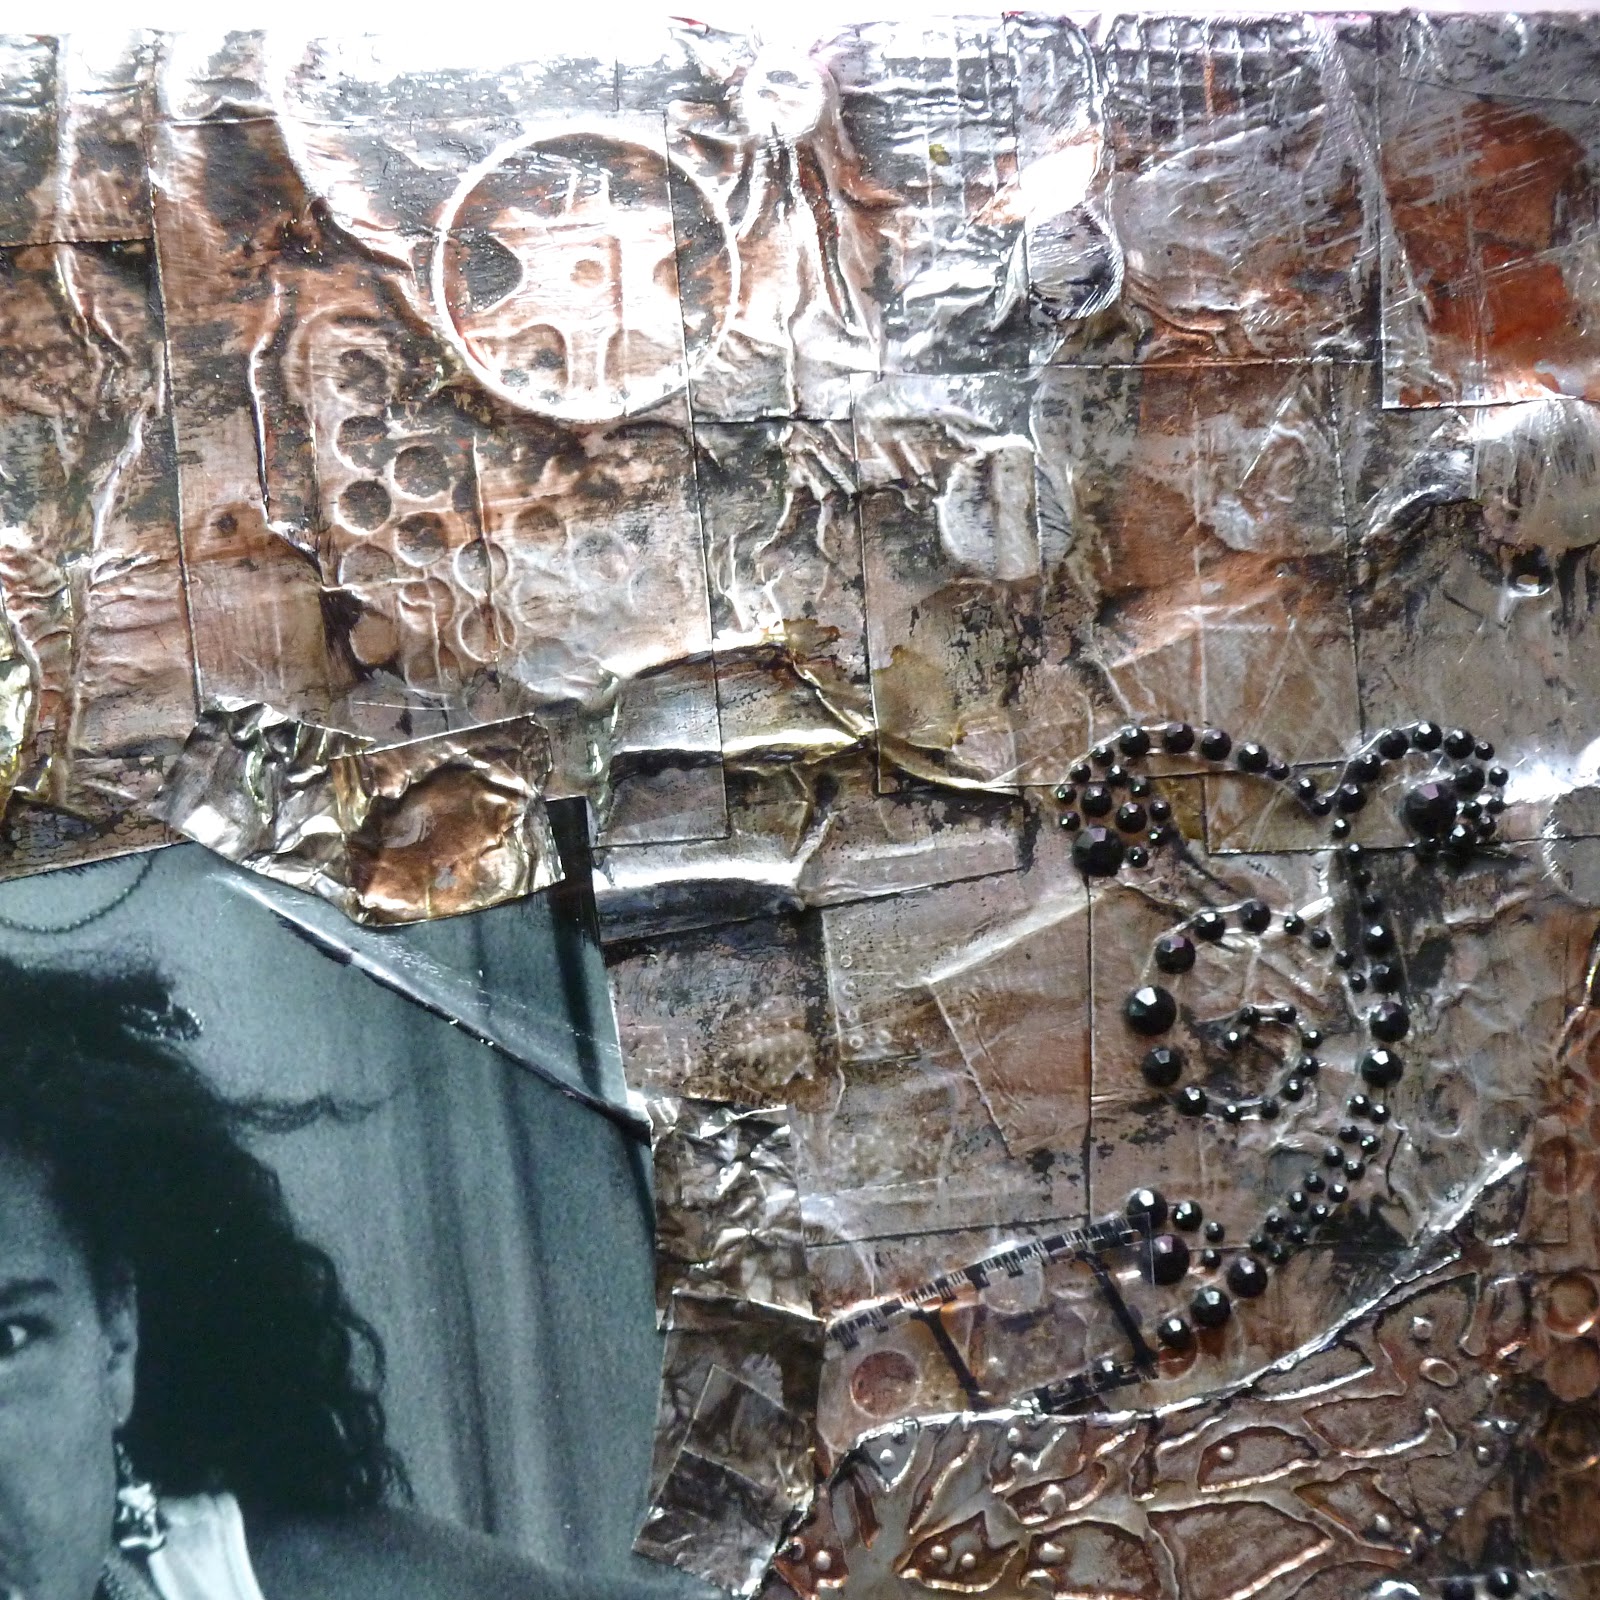
Then I covered the entire canvas with pieces of metal foil tape I finally found at Home Depot (after hitting up 4 other stores). I used a paper stump and burnished, burnished, burnished.

Then wiping the whole thing with black acrylic paint, wait and wipe off. Repeated this 3 more times until I was happy with it. The paint is in the grooves and crevases and takes away the shinyness (I know, not a word) of the tape.


Almost done...Now I started adding alcohol inks; Pesto, Terra Cotta and Copper. I just used my finger to blend them in where I wanted them to go.

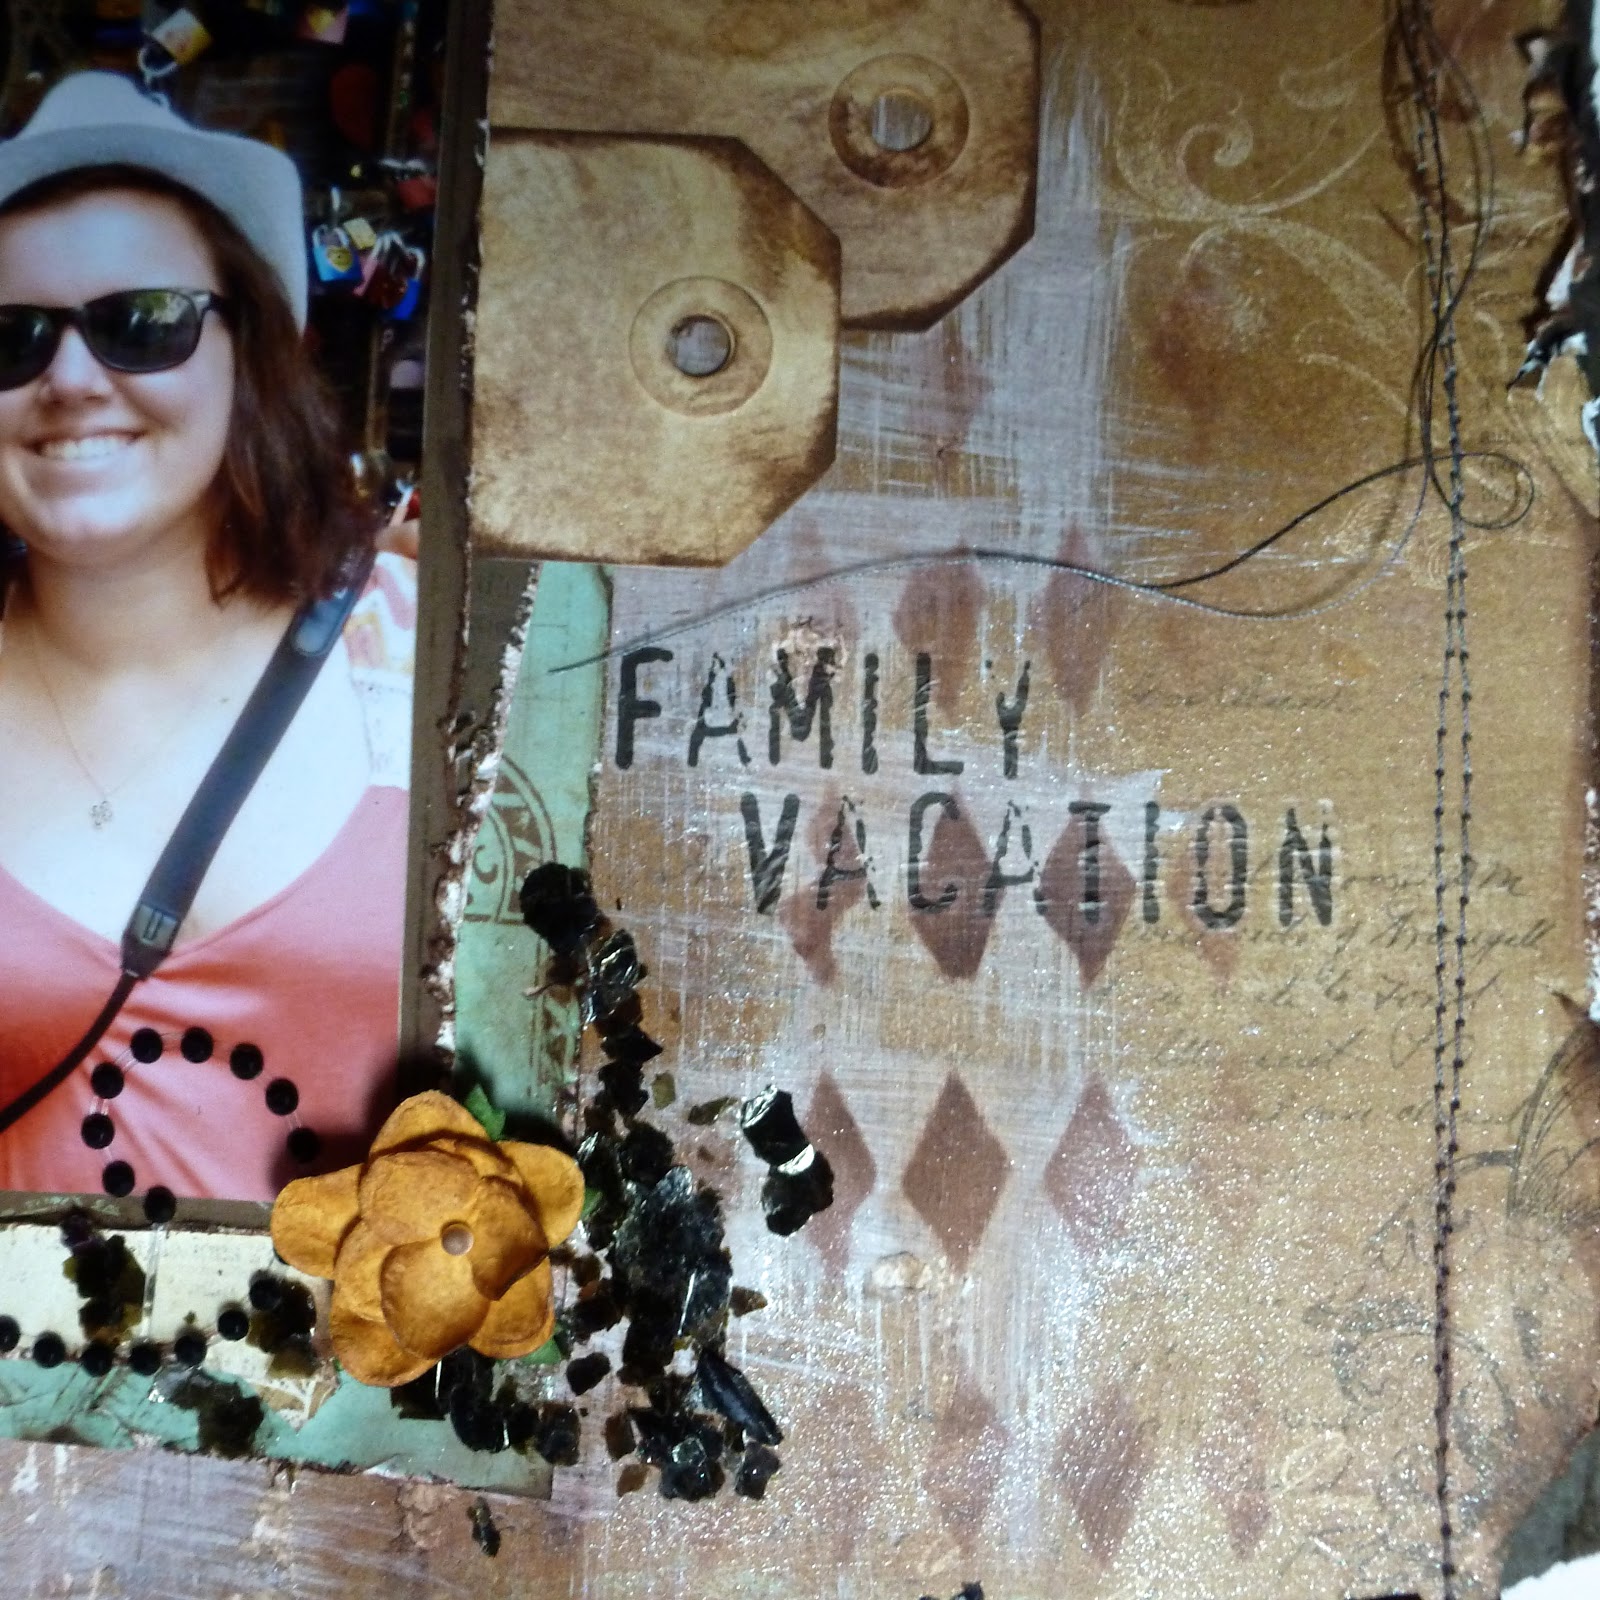
Time for my photo and embellishing. The wings and heart are grungebord that I covered with tape and ran through and embossing folder. I then repeated the same paint & ai application. The word strong I rubbed Black StazOn over to make stand out.
In the upper left corner are some beads and a dangly heart (hard to see in this pic I know, but bad weather is rolling in and I had to take it now).
The photo is a self portrait by my dd. I just love how awesome she looks in it. Ready to take on anything and anyone.


Some closeups to show you.


  So that's that. Week 3 of the Swirlydoos Ultimate Designer Challenge. Make sure to head over to the forum and see what everyone else is doing this week. I promise, you'll never look at metal foil tape the same again.

Thanks for stopping by and have a great day!

Du und Ich

A quick share today.
This layout was featured in Scrapbook News and Review. 
My youngest with our exchange student  Desi, when we visited her at her home in Germany.
The little one absolutely loves her and followed her everywhere.
We've been lucky with our exchange student experiences. We have done it 2 times now with students from Germany and each time they fit in seamlessly with our family immediately becoming part of it. I so enjoy the times we are able to do it.

 The layout was create on 7 Dots Studio paper and lots of German papers were layered behind the photo.

Thanks for stopping by and have a great day.

Friday, January 25, 2013

Valentine Classes


Are you looking for some Valentine Day art inspiration?
Head on over to The Art Studio where I have not one but 2 classes ready to go to help you get ready for the holiday.

Get a jumpstart on your card making with this one day class. You'll create three unique mixed media cards using a variety of items from in your craft room and around the house, and I'll take you from start to finish, offering ideas and showing tips I've picked up along the way. 


In this one day class we will create a special mixed media Valentine's Day wall hanging. We'll use traditional scrapbook supplies as well as some not so traditional. Throw in some mists, ink and maybe a little fabric and you will have a special 8x10 wallhanging perfect to give away or keep for yourself.
                         Both will help you get ready for Valentine's Day in no time at all.

While you are there make sure to check out all the other wonderful classes being offered.

Thanks for stopping by and have a great day!

Thursday, January 24, 2013

Ultimate Designer Challenge Week 2


The name of the game this week is layering; lots and lots of layering.
For my entry I used the January Swirlydoos kit and have over 10 layers on my page.
I have this picture of my middle daughter eating Gelato in Italy (something we did a lot of while there lol) and layering while still keeping the focus on her was a challenge.


There is FabScraps organic line of paper with lots and lots of distressing. I threw in some Prima Firefly papers. The colors of the 2 lines go together beautifully.
The Road Warrior title is appropriate, she is lucky enough to have traveled extensively in her 12 years.

Not only are there paper layers but also some different trims (I love this lace, it looks just like banners) and some tulle under the picture. The purple flowers are from some Petaloo vines I cut apart and of course some Prima bling.


There is also some stamping over the background paper. I used both Kaisercraft and Prima stamps with Tsukineko Eggplant chalk ink.
I just love how all these layers came together into the final page.

 In the upper left along with some paper and more lace are a few rubons from Kaisercraft as a final touch.

  Head on over to Swirlydoos and check out all the other wonderful layered entries for this week's challenge.

 Thanks for stopping by and have a great day!

Wednesday, January 23, 2013

Making New Friends

It's time for the mid month sketch challenge over at Scrapping Everyday Miracles. This month's sketch was created by Marjolaine and the twist was to add fussy cutting to your layout (eeekkk).


   This was my take on the sketch. Using lots of BoBunny scraps from my stash (this sketch is perfect for all those little pieces) I created this layout showing my littlest one with some new llama friends.
The butterflies were all fussy cut and the adhere only on one side to give a more 3d look to the layout.
I also painted them with some Rock Candy stickles so they sparkle.

 After this little adventure she really really wants a llama as a pet. I've informed her that we are lucky enough to have friends who actually have a llama farm and let her visit whenever she wants. She's going to have to be happy with that. Still think it's a pretty good deal.


Thanks for stopping by and have a great day.

Tuesday, January 22, 2013

Life is a canvas...

PAINT IT!

Sharing an art journal page that was recently featured in Scrapbook News and Review.
I love this quote and when showcasing it I need to do something with lots and lots of color.
Layers and layers of Lindy's Stamp Gang mists along with several Crafter's Workshop stencils.
  The stars are created with another stencil and acrylic paint. The is also some clear embossing in the upper left and lower right to create a resist for the mists.

Thanks for stopping by and great day

Monday, January 21, 2013

Pretty Princess

It's Mojo Monday over at Flying Unicorn once again.
I have a ton of things I am supposed to be doing but when I saw this beautiful sketch by Tammy I just had to play.


My pattern papers are all by Prima. I I stamped the flourishes with Kaisercraft stamps, adding more flourishes the way of RubOns and bling. The flowers are all by Prima.
The little one loves butterflies and these wooden ones by Kaisercraft fit nicely. I painted them with Silks acrylic glaze and once dry stamped on them with with a script stamp & solvent ink.

  The little one loves dressing up as a Princess and often refers to herself as such (never mind she has 2 other sisters who could be Princesses as well). It's all good though because she always then adds...and Mommy is the Queen.

Have a great day and thanks for stopping by.

Sunday, January 20, 2013

My Little Meat Eater...


A quick layout to share before the Patriots come on. (Go Pats)

I used the January kit from Flying Unicorn.
The background paper is from Pink Paislee, with Gesso swiped in areas using an old gift card.
I used mists from Tattered Angels and Lindy's Stamp Gang to add more color once the Gesso was dry.
 I used several stencils from Crafter's Workshop to add more pattern to the paper with Prima & Tsukineko ink. As finishing touches I added machine stitching and some tape.

 This picture has been on my desk for a while. I crack up whenever I look at it. My littlest one is a huge meat eater (something I don't understand cause I'm not) and when the meat has a bone in it then it's happy day for her. We ate at the Animal Kingdom Lodge while at Disney last January, a place I highly recommend. It was one of the few meals I really felt we got our money's worth and everyone walked away stuffed and happy.
 She was so excited that they had chicken legs in the buffet. I think she ate 3 of them, she couldn't get enough.

Thanks for stopping by and have a great day.

Saturday, January 19, 2013

No Refunds / No Exchanges


Over at Flying Unicorn there is a mid month challenge entitled Go Bold, Go Bright and you needed to create a tag or card in bold bright colors.
I finished up a tutorial for an upcoming post on The Art Studio's blog and still had some tags and supplies on my desk (along with some rare free time) that I decided to play.

I do have to say when I first started layering I wasn't so sure I liked the direction it was going but the more I added the happier it made me.

I used 6 different stencils and one stamp to get my layers.


For my colors I used a variety of inks, mists from Tattered Angels and Lindy's Stamp Gang, and Gelatos.

The heart I cut out from a piece of scrap paper from one of my many drawers. The colors fit in perfect and the scrap was just the size to cut the heart. I inked it in black ink and then outlined it with a white chalk pencil once I put it on the tag to make it pop just a bit. 
The wings are RubOns from 7Gypsies (I think).

  I stamped the words No Refunds, No Exchanges (stamp is from Hero Arts) randomly across the tag. I had in my mind the thought of  "I'm giving you my heart, you can't get a refund or exchange it for another". It's corny I know, but that's how my mind works as I create, what can I say.

  Thanks for stopping by and have a great day!

Friday, January 18, 2013

Swirlydoos Kit Club : Ultimate Designer Challenge


Swirlydoos Kit Club is having an Ultimate Designer Challenge happening over the next 6 weeks.
Each week a new challenge is posted for those of us playing along.
For week one it was to take a piece of chipboard or die cut and alter it to create a layered embellishment for a page, card etc.

After several starts and stops this is what I finally came up with.


I took a large Eiffel Tower chipboard piece (and when I say large--it's 12" tall) and covered it with a piece of actual French sheet music. Wiped some Gesso over it to tone it down and stamped flourishes over it. They a heavy misting with Buccaneer Bronze from Lindy's Stamp Gang. Once dry I embossed with a script stamp and copper embossing powder across the whole tower.

For the Fleur de Lis I fisrt paint it with copper paint and while wet sprinkled with UTEE. When I heated it it formed some cool texture. Once cool I stamped with a script stamp all over.


I finished the layers with a piece of crumpled and distressed paper under and flourishes on top.

This is how it looks on the page before I added anything else.
The patterned paper is from Riddersholme Design which I wiped with Gesso before misting with the Buccaneer Bronze and Tiffany's Blue mists from LSG.
The stencil is from Crafter's Workshop and I used Colorbox Mixed Media ink.

  Here is just another closeup of my altered chipboard. It was hard getting good pictures. No matter what light I used there is so much glimmer it kept messing me up.


And finally the finished page. Last April my husband took me to Paris for my 40th birthday. This pic was taken there. I printed it on canvas paper in sepia tones to match my page.


  The thread over at Swirlydoos has many more entries of altered chipboard. Head on over and chack them out.


Thanks for stopping by and have a great day!

Thursday, January 17, 2013

Enjoy


Just a quick post today sharing a layout that was featured in Scrapbook News and Review.

Tried something a bit different for me, splitting my paper and "sewing"it up with some dyed seam binding.
The color palette is also toned down from what I usually use but I love how it makes my daughter's face just jump off at you.


   The skies here are pitch black even though it's only 3 in the afternoon. The kids are running around doing the snow dance and hoping the predictions will come true (it hasn't snowed here in over 2 years).
Me personally...i'll believe it when I see it, but I really hope I don't. There is a reason I left Maine for a southern state lol.

Thanks for stopping by and have a great day!

Tuesday, January 15, 2013

New classes coming soon


Just wanted to share about 2 new classes I have coming up for sale over at The Art Studio...perfect for Valentine's day.

The first is a one day class where we will make 3 different mixed media Valentine cards. Each one is chock full of techniques and yumminess. Anyone would feel special receiving one of these.
The class will be $12.99 and has full video step by step as well as PDF downloads.
The following are some sneaks from the class...


Next up is a mixed media wall hanging perfect for Valentine's day or any day.
In this one day class we will create an 8x10 wall hanging with a large heart as a focal point.
I'll take you step by step in it's creation, always available to answer any questions that may come up.
The following are some sneaks from the finished project  (I have to say I was so happy with how this turned out I can't stop looking at it).
This is perfect to give to that special artsy friend for the 14th or keep for yourself hanging in your room.


  Both classes will be for sale this weekend over at The Art Studio, make sure to stop on by and see what else is available as well.


Thanks for stopping by and have a great day!

Monday, January 14, 2013

Family Vacation and Swirlydoos

It's my turn to post for the Round Robin challenge over at Swirlydoos.
The twist this month was things that make you happy as well as lots of layers and distressing.
I was able to follow Sherri this month and this is the page I came up with.
I pulled out a lot of parts from past Swirlydoos kits, as well as special orders to make this page possible.

What made me happy in this picture is just how my girls are together. They are 6 years apart but most days get along really really well. As a mom it makes me happy knowing what type of bond they have formed even early on in their lives.

I used several pieces of BoBunny papers from the Gabrielle collection. I distressed the base page with dry brushed gesso, followed by a heavy misting of Coffee Shop Glimmer mist from Tattered Angels. While it was still slightly wet I used sandpaper in spots to rough it up.

   I stamped in both the upper right and lower left with a large acrylic stamp from Tattered Angels. The halequin pattern is a stencil from Dylusions with Colorbox ink rubbed through it. The layers under the picture are more BoBunny distressed and inked with Chestnut Roan ink.


The flowers are from Bazzill Basics, they were slightly too yellow for the page so I rubbed more Chestnut Roan ink on them to tone it down. The flourish is from ZVA Creative and the metal trinket is Prima.
  Last but not least I took 2 small tags and misted with Crushed Shells glimmer mist by Tattered Angels and layered under the picture. The black bits all over the page (sorry for poor lightening-it's another grey day here) are actually Tarnished Mica Fragments by Stampendous. The title is a RubOn from my stash. My sewing machine provided the finishing frame around the layout.


 Thanks for stopping by and have a great day.

Friday, January 11, 2013

Remember Always


The main challenge this month over at Scrapping Everyday Miracles is Sad Moments. I know when you look at this picture you are thinking to yourself, "that looks pretty happy to me".
But the story...Every summer we rent a house in Kiawah and all the family comes and hangs out. This picture was taken of the youngest and her PopPop in 2011, the last summer he was alive to make the trip. Even at this time he was very very sick but with a lot of cajoling from her made it to the water's edge for one last dip.
The 2 of them each thought the other hung the moon. The little one would sit on his lap for hours not wiggling (usually sleeping). Somedays that was the only time she was still. On the flip side the sicker he got she turned to be the only one who could get him to get up and move and even eat.

It makes me sad that he won't be around to see what kind of young lady she will grow up to be.


For my layout I used my January kit from Flying Unicorn and scrap lifted a layout from Ilene Tell (with her permission of course).
The background paper is from Basic Grey. I inked it with Vintage Photo distress ink through a Mister Huey's stencil in spots. 
Torn pieces of Fancy Pants and corrugated cardboard help make up the layers. Some Lake Mist paint from my dabber was added to both the cardboard and in spots on the background.

 I wanted a mist to match the LapisLazuli ink I had used to edge my papers. When I couldn't find one in my stash I created my own by taking the ink pad, rubbing it on wax paper and misting it with water. I then used a paintbrush to flick it in spots.
 The black spots are from Dylusions Black Marble and flicked off the end of the nozzle. Finally for my last mist color I used Georgia Peach Color Shine by Heidi Swap. 2 large drips in the upper right and some fine spraying elsewhere added just the right color.


 Finally Remember Always....It will always be our job as parents to make sure that her PopPop lives on in her mind...Always


Thanks for stopping by and have a great day!

Thursday, January 10, 2013

Challenges


Today I want to share a layout I did for one of the manufacturer events at Scrapbook News and Review.
Sometimes you can make a big impact with minimal supplies. Case in points is this layout.
The sentiment stamp is from Technique Tuesday (provided to use staffers) and so aptly fits life. Anyone who deals with a 6 year old on a daily basis knows that there are constant challenges. My little one is so full of personality that most days can be quite an adventure.

 The bird die is from The Cat's Pajamas (another mfg who provided product), adding some Caran D'arche watercolor crayons and machine stitching and the layout is complete.

  I love my daughter's face in the picture, I can just imagine what she thinking up next in her mind. It'll have me running I can guarantee that.


Thanks for stopping by and have a great day!

Wednesday, January 9, 2013

New Friends


Old pictures but a new layout. The pictures are from 2003 and our first visit to Charleston, SC. Outside the Aquarium is a bench where this frog sits. The girls both wanted their pictures taken with him. We have gone back many times since this visit and her is still sitting on the same bench looking out over the water. They still make time to sit and visit with him each time they come to town.

I did this up for the Tissue challenge over at Flying Unicorn. You needed to incorporate tissue paper somehow onto your project.
For this I took a piece of tissue paper and crumpled it up. Using Gel Medium I adhered it to the center of the page over a piece of FabScraps paper. I heavily misted it with Crushed Shells glimmer mist from Tattered Angels and then once dry rubbed some ink over the ridges.


I used a piece of sequin waste and black ink to add a bit more pattern to the background. I also mist a tag with the same Crushed Shells mist then cut it in 2 pieces and tucked under the photo.

  There are some Teresa Collins strips layered under the photos as well. A scrap of seam binding and some Prima Crystals finished it off.

 If you ever get to Charleston make sure to head over and say hi to Mr Frog. He's sitting on the bench patiently waiting to make some new friends.


Thanks for stopping by and have a great day!

Tuesday, January 8, 2013

Resist This: A Class All About Resists

Today I want to share some samples I created for my Resists class.
Titled Resist This: A Class All About Resists it consists of 12 lessons and 7 bonus lessons.
Each lesson has downloadable step by step instructions in PDF format. There is also a full step by step video for each technique as well as many finished samples to inspire your creativity.


No matter what type of papercrafter you are there is something for you here. We make ATCs, Tags, Cards, Layouts and more.

I'm always available to answer any questions, offer advice as well as compliments on what you create.

Come join me over at The Art Studio and check out all that is available today.

Small or big there is something for you to try.

While you are there make sure to check out all the offerings that are available as well from the other talented instructors. 
 Thanks for stopping by and have a great day!