Showing posts with label Stencil Girl stencils. Show all posts

Saturday, March 5, 2016

March Hopping with Craft Hoarders Anonymous

Welcome everyone to the
March Hop
with the Ladies of Craft Hoarders Anonymous.
Can you believe we are already in the 3rd month of 2016????
EEEKKK time is flying.
Every month on the 5th a group of us
will share projects and offer inspiration on ways
to use your hoard.
(Remember, use your hoard you get to buy more. 
It's a win -win!)

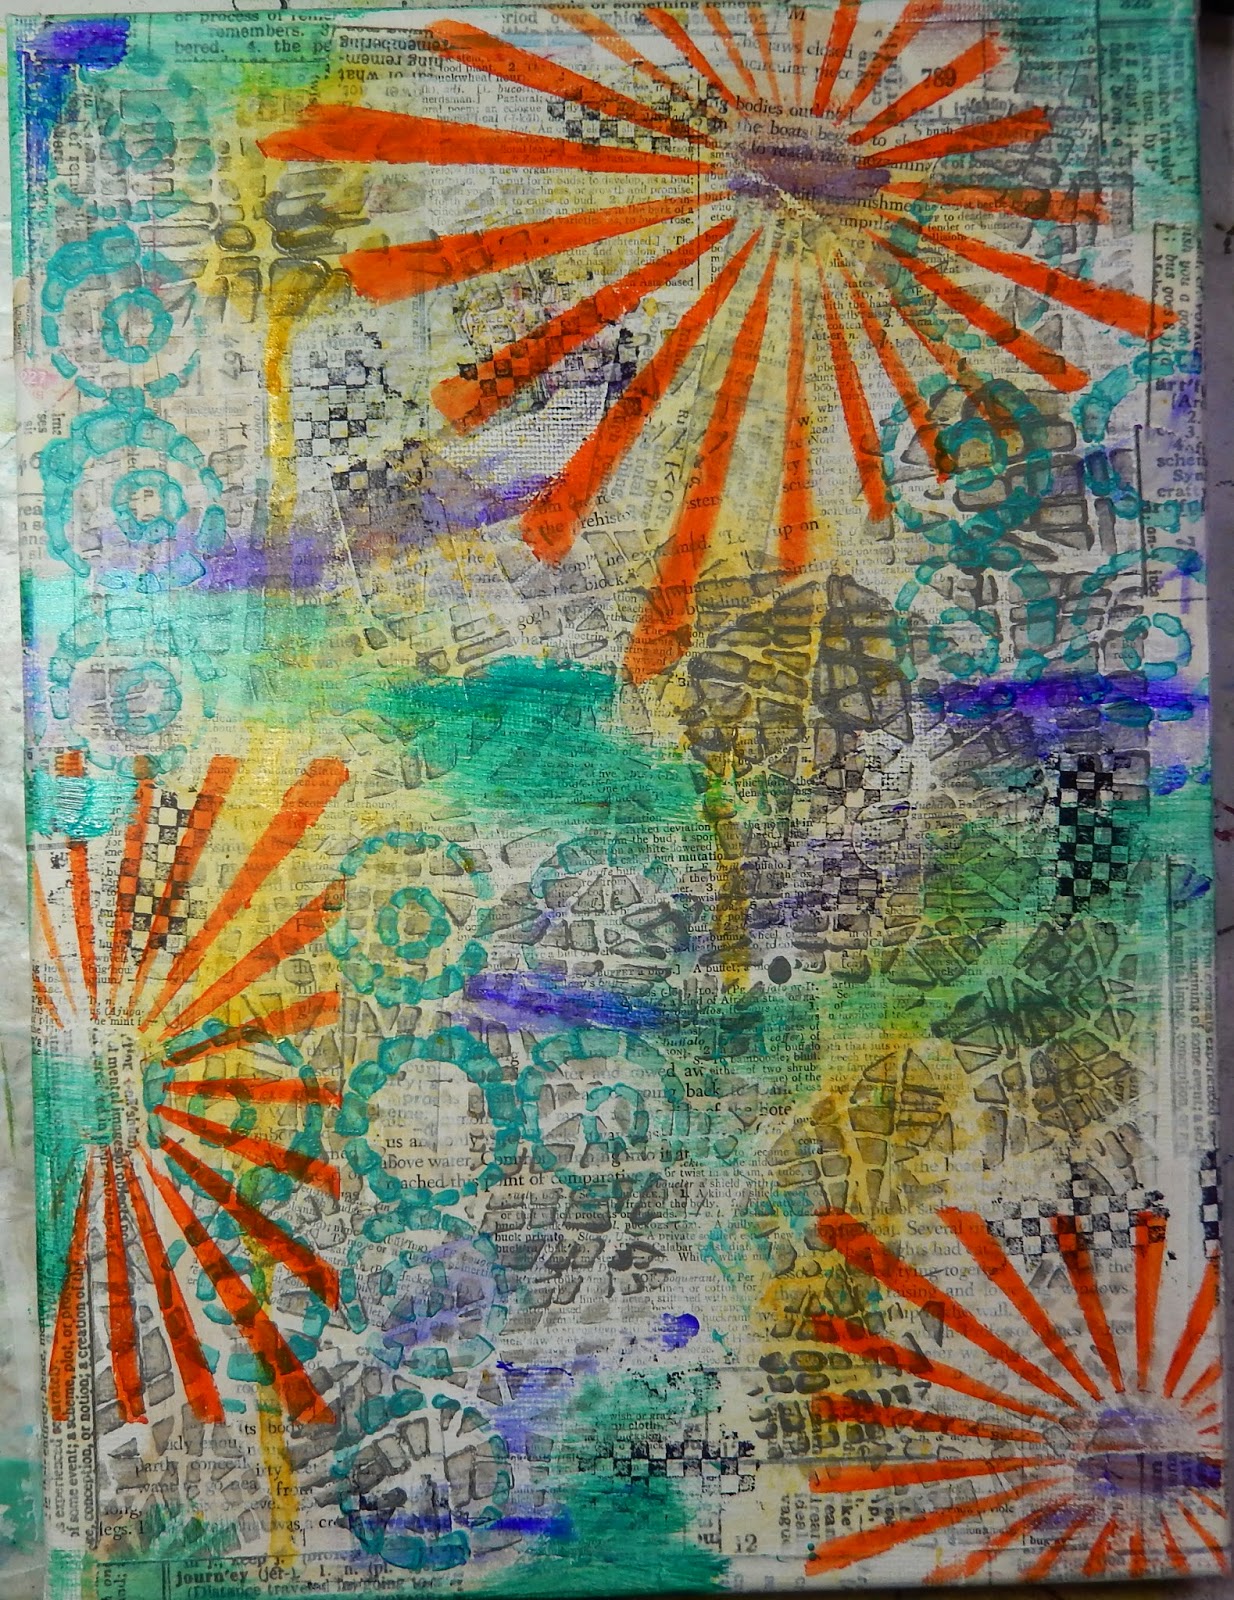
Today I am sharing an art journal page.
The background started when I used the page to clean paint off my brayer
during a Gelli Printing marathon.
I often keep blank paper nearby for just such a purpose,
instant backgrounds for future projects.

I added Washii tape, lots of stenciling,
including this awesome text one by Stencil Girl stencils,
and my 3 hearts (for my 3 girls)

Here is the list of all who are participating this month


Make sure to stop by them all and leave some love.

Thanks for visiting and have a great day>

Monday, October 5, 2015

October Hopping with Craft Hoarders Anonymous!

Welcome everyone!
It's time for another hop with the ladies of 
Craft Hoarders Anonymous.

Each month on the 5th we'll share ideas and inspiration on how you can use
up your stash.


You should be coming to me from Marissa's blog .
After, head on back to Gloria's blog. 

Once a month a group of us will get together to inspire, share, and show you how to use up 
your hoard.
To start at the beginning or to get a full list of participating bloggers
head on over to Gloria's blog.

This month I used up a bunch of hoarded Gelli prints
and turned them into art journal pages for an upcoming swap.
I have such a large stack of prints that I barely made a dent in it with this project

Here is a small overview of several and below are closeups of the pages.


This first page is a pink and black base using Stencil Girl & Crafter's Workshop stencils.
Once the stars were added,  some Liquitex acrylic ink was flicked  on
and misted with water to make some drips.


The next two use a variety of stencils and multiple layers
of paint over Gelli prints.
Rub ons and Washii tape added as accents.


A blue Gelli print base combined with 
book text also gel printed to create this heart page.
The inside of the heart is lined with an Intense pencil and the word was stamped
and traced over with an acrylic paint marker.


Some Washii tape, stamping and coloring were added to this Gelli print.
The stamp is from Donna Downey,
once stamped it was traced over with an acrylic paint marker and colored in with Pitt Big Brush markers.


Another blue printed base with various
Liquitex Acrylic inks dripped down.
Rub ons were added and the heart was cut from another piece of Gelli printed book text.
The sentiment was stamped on a scrap of Gelli printed tissue paper.


Last page share.
The base is another Gelli print.
The larger blue circles were cut from a piece of Gelli printed tissue paper.
(I love using my Gelli plate with tissue paper, you get added depth from the wrinkles in the paper,
and the layers blend seamlessly in collage)


Well that is it for this month's 
Hoarders Hop.

Make to check with us every 5th of the month to get inspired on ways to 
use that hoard.


Thanks for stopping by and have a great day!

Wednesday, September 23, 2015

Sharing another Art Journal page today.

Been down with a cold / flu for a week and a half
(way to early in the season!)
So haven't done much creating.

Finally starting to feel better and pulled out my AJ yesterday.
Created a page on a base of leftover paint from making postcards a while back.
I always use pages in my journal for the extra paint from projects, takes that blank page syndrome away.

So the base was leftover paint.
I then splattered some Liquitex Acrylic ink in Carbon Black
randomly across the page.
Then some music lines were stamped using Archival ink.

The hearts are leftover painted papers from my heart postcards
aslo a few weeks back.
Seriously I don't throw ANYTHING away.
They were then outlined with a Derwent Intense pencil.
The pink painted scraps also came from an old project.

Dylusions mist in Vibrant Turquoise was sprayed heavily in spots 
and let drip.
A sentiment was stamped on a scrap of Gelli printed tissue paper 
and outlined with a white gel pen.
More doodling with the white pen in spots.

The circles are made using a cardboard tube and white
acrylic paint.
I like how the paint reactivated the Dyslusions mist in spots and drew up 
some of the color to tint it.

Finally there was Distress ink in Black Soot
used with a stencil from Stencil Girl Stencils to add
words to the background as a last layer. 
Think I need a new ink pad, it was pretty light but in the end it was just what I was looking for.

Feels good to be back making things.

Thanks for stopping by and have a great day.

Saturday, August 1, 2015

Making my first DECONSTRUCTED Art Journal page...

I recently joined a group on 
Facebook called DECONSTRUCTED Art Journaling.
Instead of swapping full on art journals we swap pages or signatures.
In the end you get 3 pieces of art to add to your journal.
I loved this idea and quickly jumped in, I'm always looking for inexpensive ways to swap art.
Pages are definitely easier to swap, almost instant gratification, instead of waiting for a book 
to make it's rounds the pages come directly to you.
Absolute fun!

This was my first creation for the swap.
In the end you create a front, center and back page to swap.

My front page is created using Gesso, NeoColor IIs and stamping.

Open up the signature and this is the main piece.
The background is created with acrylic paint, stamping and collaging some 
Gelli printed tissue papers.
I did a little machine stitching up the side and added some Crafty Secrets collage images.

The quote is a Donna Downey stamp on more Gelli printed tissue paper.


The back page is created using
Modeling Paste, A Stencil Girl stencil, and several
layers of acrylic glazes.


Off to get this in the mail.

Thanks for stopping by and have a great day!

Friday, July 24, 2015

I'm back.....


It's been a loooonnnnggggg time since I blogged.
Finally starting to unpack my craft room again and find my mojo that seemed to have been packed up with it.
Life has been flying by at the speed of light.
Still looking for that pause button to slow things down.

Today's page started when I pulled out my Gelli Plate to let the 8 yr old play.
I sat my Art Journal next to her so she could use a blank page to clean the paint off her brayer.
Later I came back and had the start of a page.
Guess you could call it a collaboration.
I added scraps of Gelli Prints.
Some stamping with Solvent ink & Acrylic Paint

A few rub ons by Tim Holtz 
and finally my thought came from a Stencil Girl stencil.


The explosion of color is making me happy today.

So good to be back creating and playing.

Thanks for stopping by and have a great day.

Monday, June 16, 2014

Craft Hoarders Anonymous Challenge 10…and Hopping with Stencil Girl Stencils!!

It's time for challenge 10 at


This week the Craft Hoarders Anonymous Challenge Blog is changing it up...with a blog hop! Challenge #10 is ready at the Craft Hoarders Anonymous Challenge Blog but we are doing things a bit differently this time! We are doing a week-long blog hop with STENCIL GIRL!

Each day this week you will visit the Craft Hoarders Anonymous Challenge Blog see the fabulous designs of the Craft Hoarders Anonymous Team, and then you will visit the StencilGirl Talk Blog to see what their team is doing! For the blog hop order, see the end of the post.


Now, for the challenge!

                               Challenge #10 Spray It! Ink It! Paint It! Smear It! Emboss It!
Show us your inner mixed media diva! Use spray mists, inks, paints, modeling paste, embossing powder, pastels, chalk, and whatever messy media you can find! Let's dig into that hoard, pull out some of that "messy stuff," and use it up! There is a mess-maker hiding in all of you! Let her/him out to play!

I created this 9x12 canvas for the challenge.
If you keep scrolling I even have a step by step on how the background was created.
Stencil Girl Stencils used for this piece:

Some closeups...


Supplies:
Stencil Girl stencils
Tim Holtz stamps
Unity Stamp
Washii tape
Archival ink
Gelatos
Silks Acrylic paint
Golden fluid acrylics & Liquitex acrylic paint
Book text
Dylusions mist
Lindys Stamp Gang Starburst Spray
Gesso

Remember I said there was a step by step on how I created the background?
Well here you go….
Cover a canvas with torn pieces of book text and Washii tape.
Don't cover the whole canvas, the paint will react differently with the different surfaces adding some interesting texture later on.

Give a very light wash of Gesso over the canvas.
Wipe off most of it, you aren't covering the text, just toning it down.

Using the 9x12 Map stencil add Grey paint to the canvas.

Use the 6x6 Broken Circles stencil and teal paint.
Add the circles randomly across the canvas.

Mist with Lindy's Stamp Gang Starburst Spray
Lift the canvas so the mist drips down, then dry.

Stamp in spots with the checkerboard stamp from Tim Holtz and Archival ink.

Use the 6x6 Circle Rays stencil and Orange Gelato.
Add several spots of the rays and orange.


Using Teal Zircon Silks Acrylic Glaze and my finger
I added spots of color in areas.

I repeated this again using Snapdragon Silks Acrylic Glaze and my finger.
Both times just to add a bit more color, and using my finger really lets me rub and blend the color in.

I stamped the stars (again Tim Holtz) using Archival Ink.

And added a large heart cut from book text.
Finished it off with a stamped sentiment and a burst of Vibrant Turquoise mist from Dylusions.


Blog Hop Order:

June 16
Christy Butters (that's me!)

June 17

June 18

June 19

June 20
    
    Remember, you have two weeks to play in the new challenge! Challenge #10 closes June 29th at midnight PT. Link up your project here to Challenge #10.


One talented participant will receive this prize, donated by Stencil Girl and WorldWin Papers.
The winner will receive a selection of WorldWin papers in 12 x 12 and 8 1/2 x 11, three Stencil Girl stencils, and a DVD.

Thanks for stopping by and have a great day!